

OnSite Mobile App
Last updated: Nov 18, 2026
36
views

Overview
The Getac Evidence OnSite Mobile App enables law enforcement personnel to capture, manage, and securely upload digital evidence including photos, videos, audio, and text notes directly to the Getac video suite platform. External evidence collection from citizens is also supported via shareable evidence request links.
Feature Scope
| Feature Area | Description |
| Login | Authenticate through Getac Evidence and your phones security method |
| Capture | Photos, videos, audio, text notes |
| Evidence Requests | Share via QR code or SMS to collect citizen-submitted evidence |
| Import Evidence | Add photos and videos from the device into the app |
| Review / Manage Files | View, Playback, rename files, delete, place items on hold to upload later |
| Categorization & Upload | Categorize files, fill out category forms, create or add to a Case with the Case ID form field |
| Upload Monitoring | Track upload progress in the asset bucket and resume interrupted uploads |
| Asset Bucket | View metadata of uploads, add files or share the evidence link request for recent uploads |
| Profile | Supports managing your default station for evidence and logging out of the app |
First Time Setup
| Requirement | Details |
| Device | iOS |
| App Installation | Via the TestFlight app on iOS |
| Account | Getac Evidence account |
Installation (BETA)
- Download TestFlight from the app store
- Accept the TestFlight invitation sent by Getac
- Install the app through TestFlight
Initial Configuration
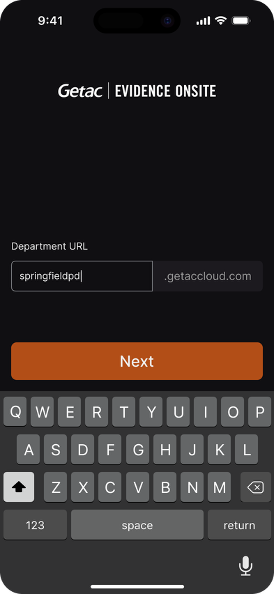
- On the first screen, enter your department’s unique URL
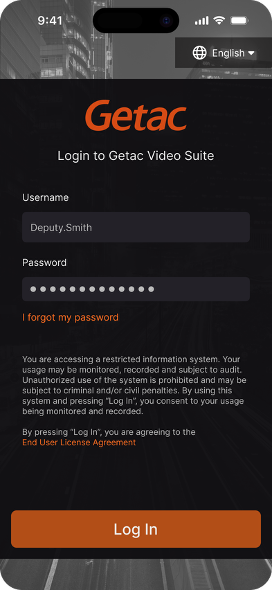
- On the next screen select ‘Log in’ and then fill out your credentials
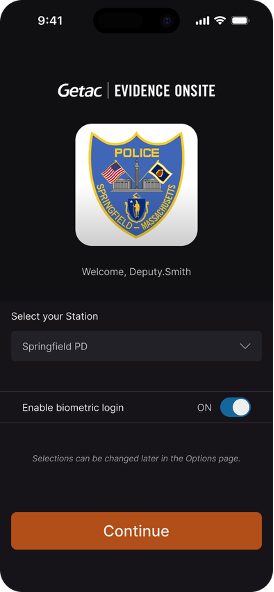
- Once logged in, select your station and biometric login preference, then select ‘Continue’ to complete setup
- The app will prompt you to allow access to FaceID, location, microphone, and camera of your device
 |
 |
 |
Key Workflows
Capture Evidence
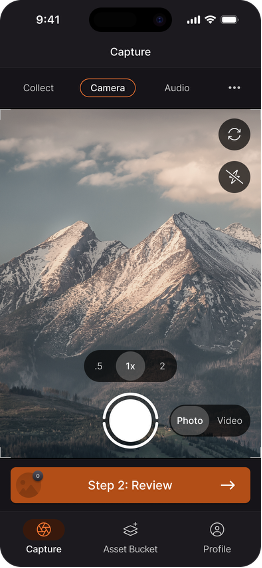
- Capture: From the Capture page, choose from the options at the top for Collect, Camera, Audio, and the action menu (three dot icon in the top right) containing the note and import evidence options.
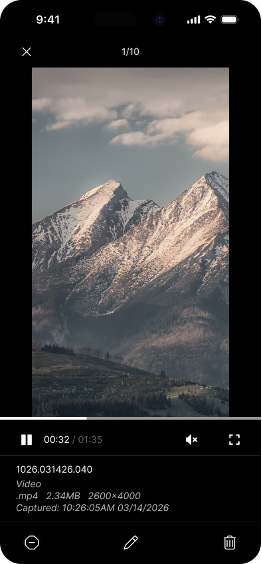
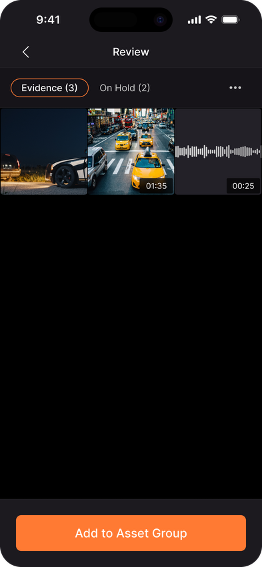
- Review: When done capturing or as needed to manage files, select the ‘Step 2: Review’ button to see the gallery page. Use the upper left arrow to navigate back to Capture.
- Action menu contains a ‘select’ option to make bulk deletions.
- Selecting a file in the gallery will open it to view, playback, rename the file, delete, or place on hold to upload later.
- Swipe left and right while viewing a file to navigate to other files.
- Categorize: When done reviewing, select the ‘Step 3: Categorize’ button, select ‘New Evidence’.
- To skip categorization, slide to save without selecting a category.
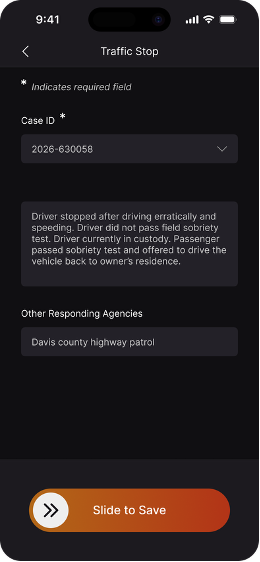
- Select a category, if the category has a form it will display. The Case ID form field can be used to create a case or add to an existing one.
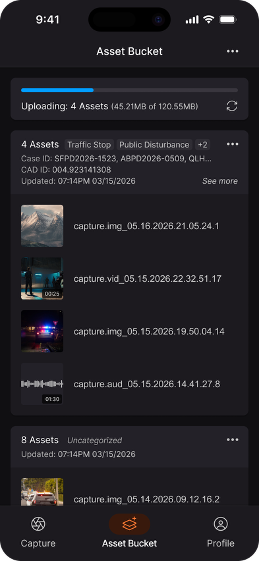
- Upload: Once saved, you will be navigated to the asset bucket where you can monitor the upload progress.
| Capture Page | Review Details Page | Category Form w/ Case ID | Monitor Upload Progress |
 |
 |
 |
 |
Request Evidence
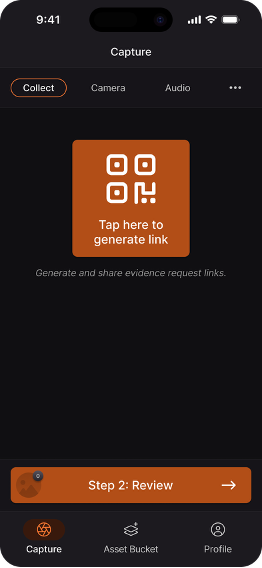
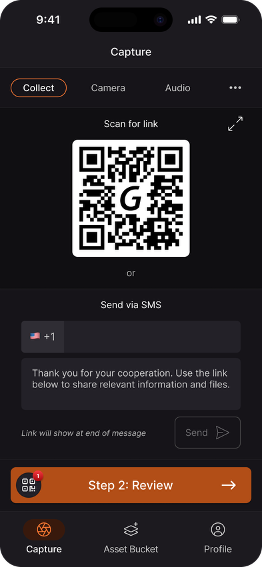
- Generate Evidence Request Link: From the Capture page, select ‘Collect’ in the top left and select to generate an evidence request link.
- Share Evidence Request Link: Once generated, the link can be shared by QR code shown or via text message.
- Recipients will see the link open in their browser to our Getac Evidence Collection tool.
- Review: On the evidence request's detail page in Review, the QR code is visible, it can be put on hold and deleted.
- Categorize and Upload follow the same steps as when you’re capturing evidence (see section above).
 |
 |
Manage Uploads
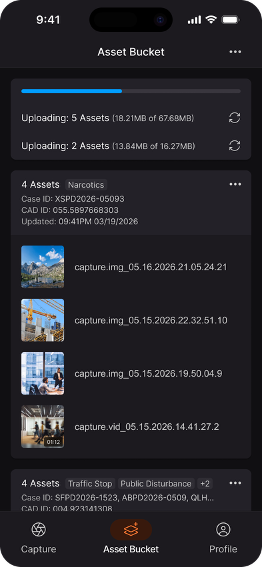
- Asset bucket uploading progress: Monitor upload progress at the top of the page.
- uploads continue when the app is running in the background and will automatically resume if connectivity is lost.
- If an upload is interrupted by the app force closing, the upload will show as queued with a ‘retry upload’ button to continue the upload.
- Asset bucket recent uploads: Recent uploads will display the evidence group metadata in the asset bucket
- The upper right action menu contains options to ‘Upload asset group' which returns the user to the Review page to upload additional captures, and an option to remove all assets from view in their asset bucket.
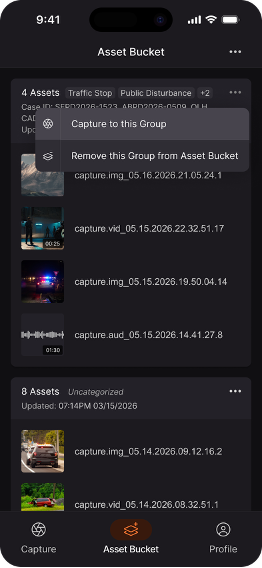
- Each asset group has its own action menu with options to capture more files or remove the group from the bucket
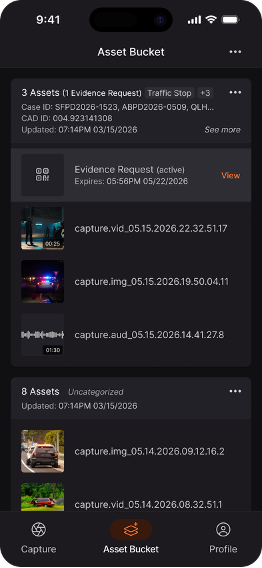
- Viewing Evidence Request Link: Active Evidence request links can be opened to same collection screen with QR code and text message options within the asset bucket.
- Add files to an existing evidence group: From an asset group's action menu, select 'Capture to this Group' to return to the Capture page in the context of that group. Files captured will be added to that evidence group on upload.
| Multiple Groups Uploading | Evidence Request Link | Add to group action | Review & add to a group |
 |
 |
 |
 |
Technical Notes
- For each capture “session”, any mixture of captures and a request link will upload to the same evidence group
- One evidence request link is allowed per session, shareable to multiple recipients
- Uploaded evidence groups will display in the mobile asset bucket until removed by the user
- Updates to metadata of evidence groups made in Getac Evidence will reflect in the mobile app asset bucket

