
 463
463
Creating and Applying Configurations
-
Select Configurations. You will see the New tab page.
-
Select the organization (if existing), model name, and OS version according to your target device.
-
Enter the config name and, if needed, the description.
-
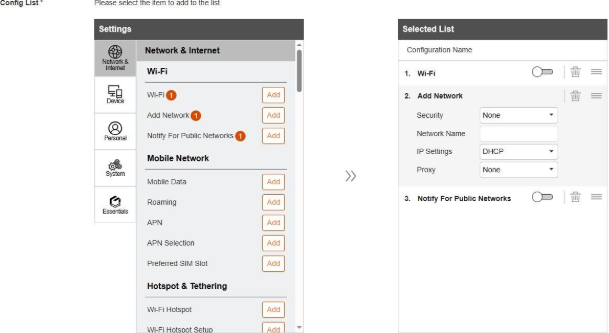
At the Config List, select the desired item from the “Settings” column and click Add.
The selected item will be added to the “Selected list” column at the right side.
-
Configure the settings as needed. (Three of the settings are described below.)
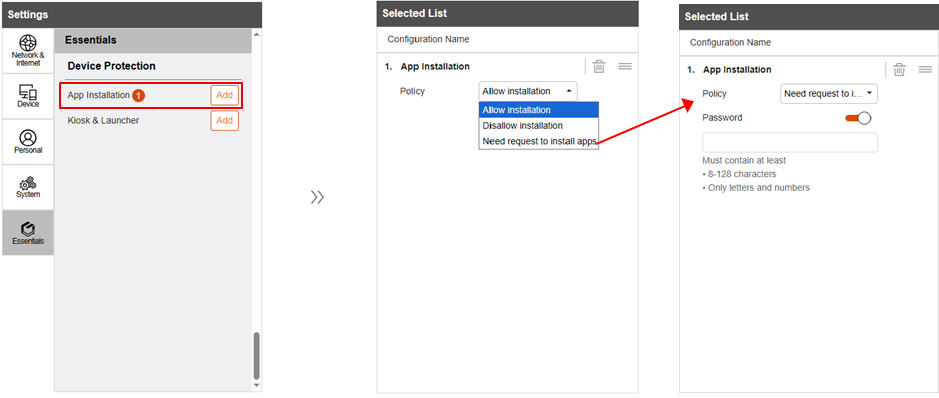
App Installation: This relates to the “Device Protection” function for Android devices. You can select a policy from the drop-down list. If you select the policy Need to request to install apps, enter the password in the input field.
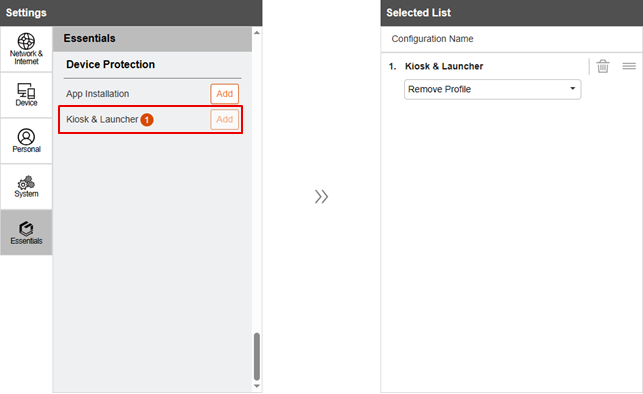
Kiosk & Launcher: This relates to the “Kiosk & Launcher” function for Android devices. With Kiosk & Launcher profiles created, you can add the desired profile to the configuration. After selecting Add, select the profile from the drop-down list.
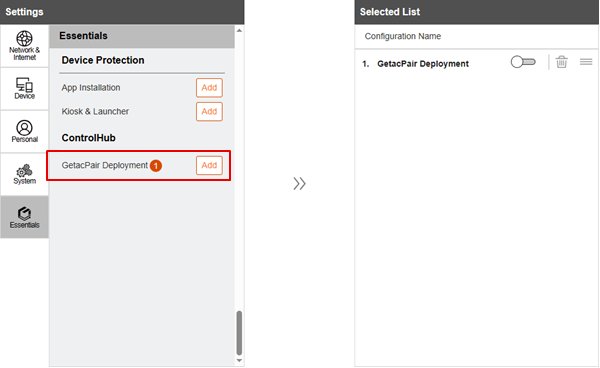
GetacPair Deployment: This function is available for supported Android devices only. It allows you to set up a device as the broadcaster for the purpose of mass enrollment. After selecting Add, slide the GetacPair Deployment switch to the “on” position.
NOTE:
-
If you want to remove a setting item, click
 of the item.
-
If you want to change the order of the item, click and drag
 of the item for moving the item to the desired position.
-
A circled number will appear beside an item to indicate the total number of the same item added. In case you repeatedly add an on/off switch of the same item, only the latest one will take effect.
-
When finished with the settings, click Save.
-
There are three methods to apply the configurations to the target devices.
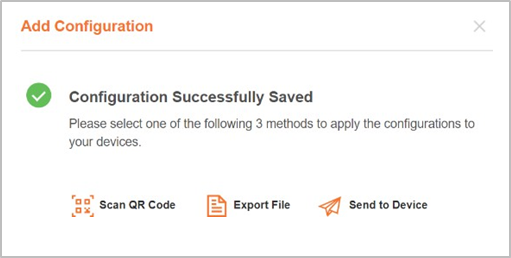
-
Scan QR Code: Select this method if you have the device(s) with you. A QR code will be displayed in a popup window. Have the device open the Essentials ControlHub app, select Configuration -> SCAN, and use the device’s camera to scan the QR code.
-
Export File: Select this method when necessary. In the popup window, select the file type and contents. Two file types are available: File and Image. Select File if file size is your concern. For example, you may want a smaller file when using a USB disk for file transfer.
Select Image to export the QR code as an image file so that the image can be scanned. After your selection, click Download.
-
Send to Device: Select this method if you want to apply the configuration over the air. In the popup window, select (check) the target device(s) and click Send. The action will be performed when the target device is connected to the server.
Using Existing Configurations
After configurations are created, you can apply an existing configuration to other devices or change an existing configuration for saving as a new one.

