How to Configure The NF42

Jul 30, 2025
 554
554
Overview
The NF-42 is the Getac's latest dual-lens camera, capable of recording in 4K. It contains its own CPU, on-board storage, and runs a Linux OS. The NF-42 can be used in the following ways:
- Record video on both cameras in a dual-lens configuration.
- Record video with one lens and operate as an ALPR with the other.
Specifications are located here.
Caution:
The NF-42 CANNOT be used with a VR-X20 F1.
Configuration
Perform the following steps to configure the camera:
Getac Enterprise
- Navigate to the Unit Configuration Template page in Getac Enterprise under Setup>Unit Configuration>Unit Configuration Templates.
- If using the camera for ALPR, toggle the switch to the On position as shown in the picture below, if not, skip this step.
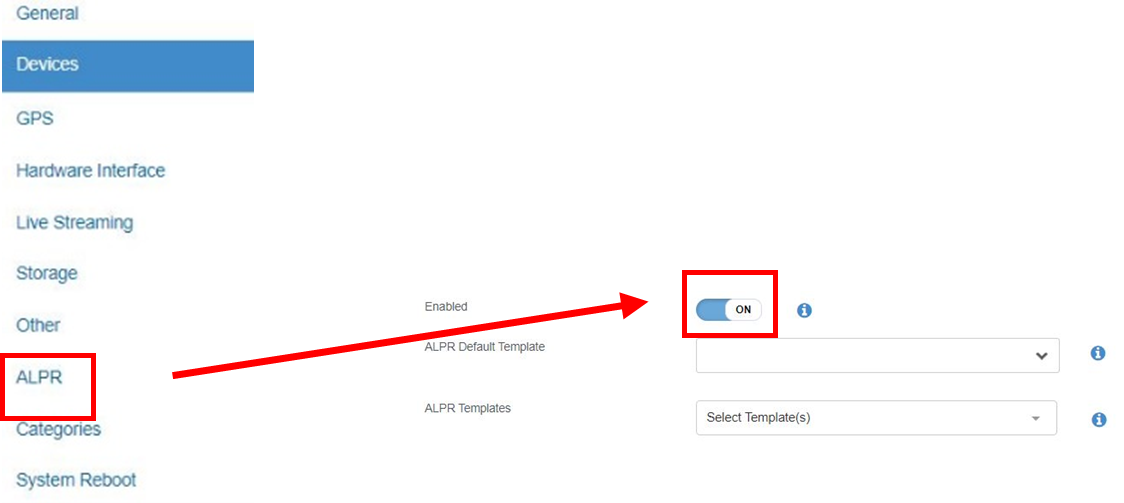
- If using the camera for ALPR, toggle the switch to the On position as shown in the picture below, if not, skip this step.
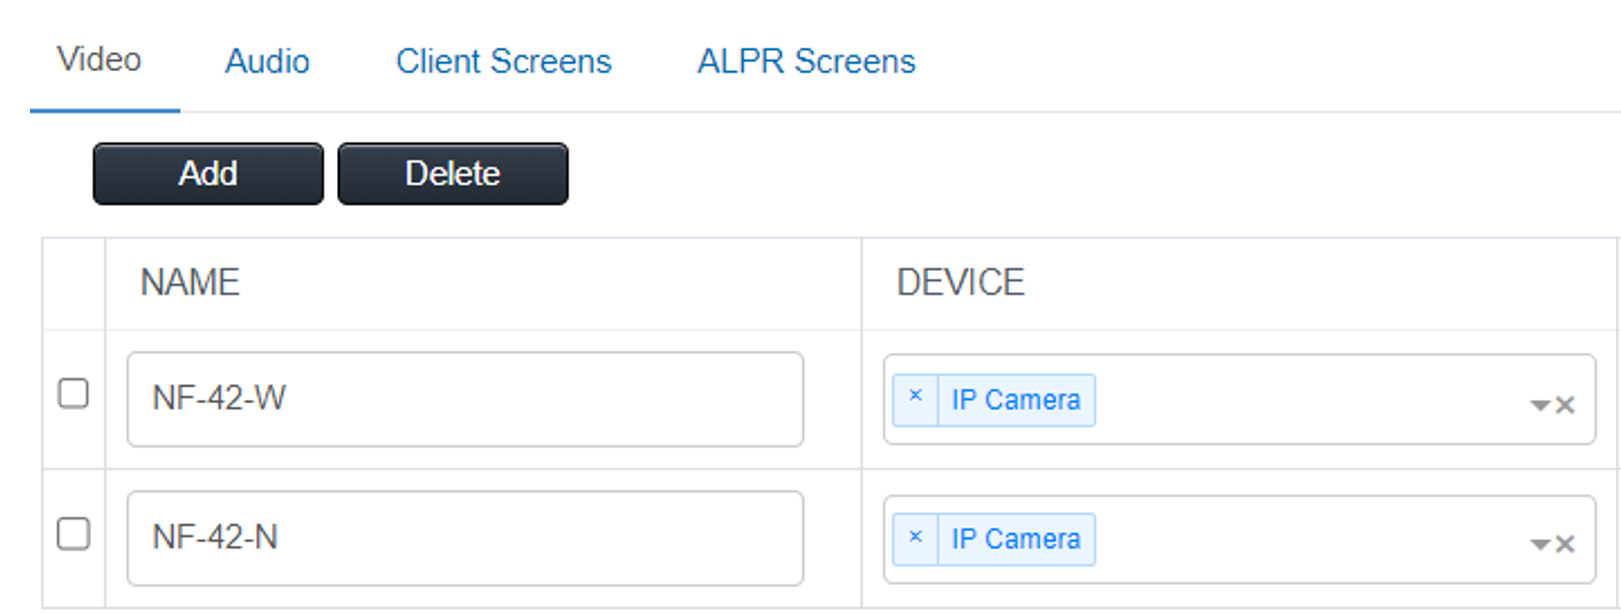
- In the Devices menu, add each camera in the Video tab as an IP Camera, as shown below:
- Click on each IP Camera to configure the Device Values as shown below for each lens:
- NF-42-W (Wide angle lens)
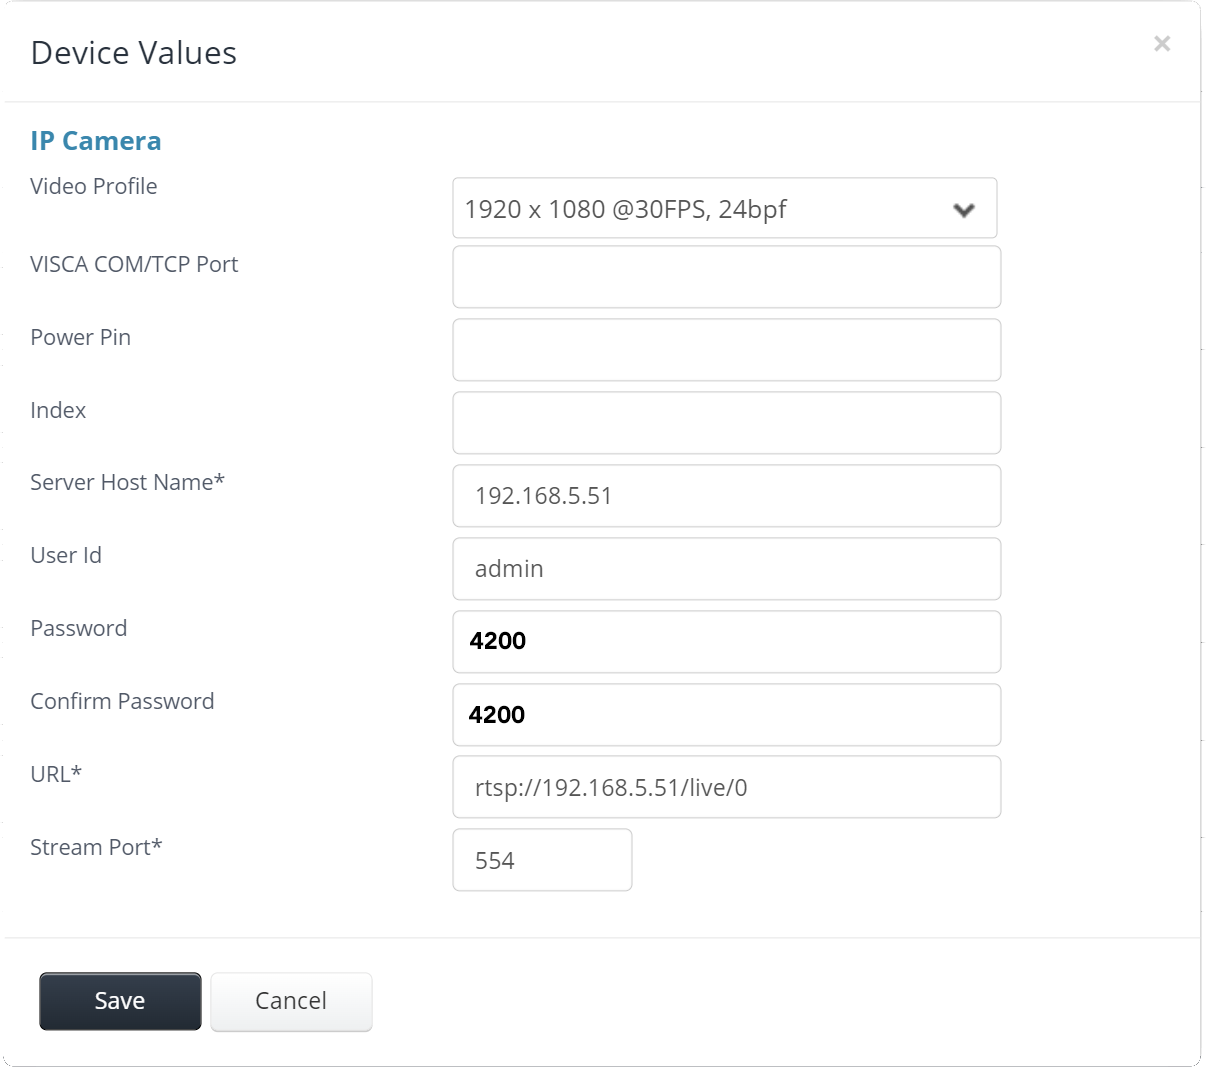
- NF-42-N (Narrow angle lens)
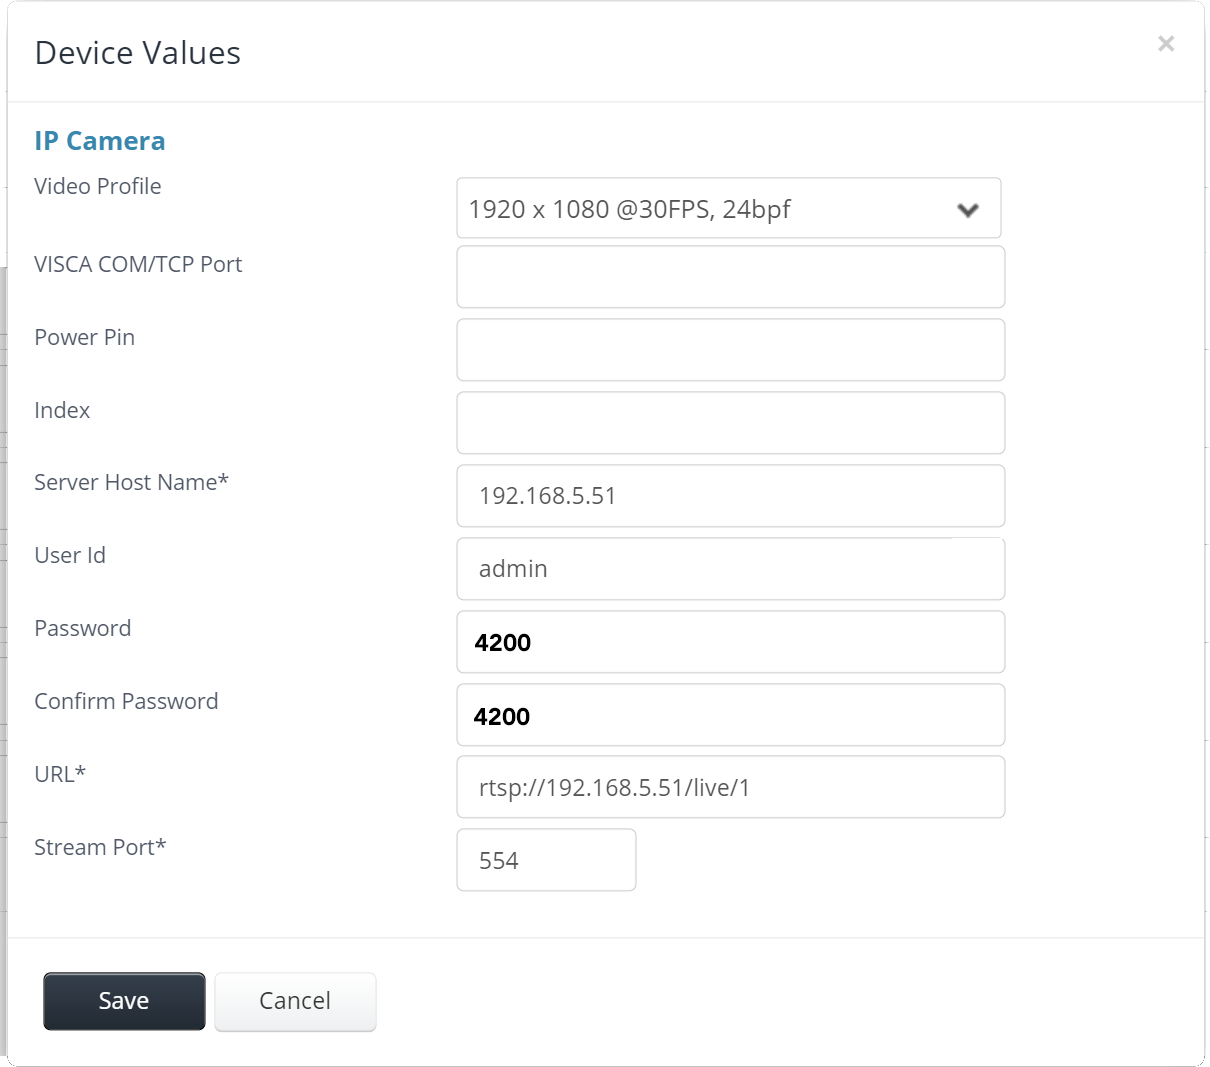
- NF-42-W (Wide angle lens)
- Add additional cameras and audio devices as needed.
- Complete the Client Screens according to the desired configuration.
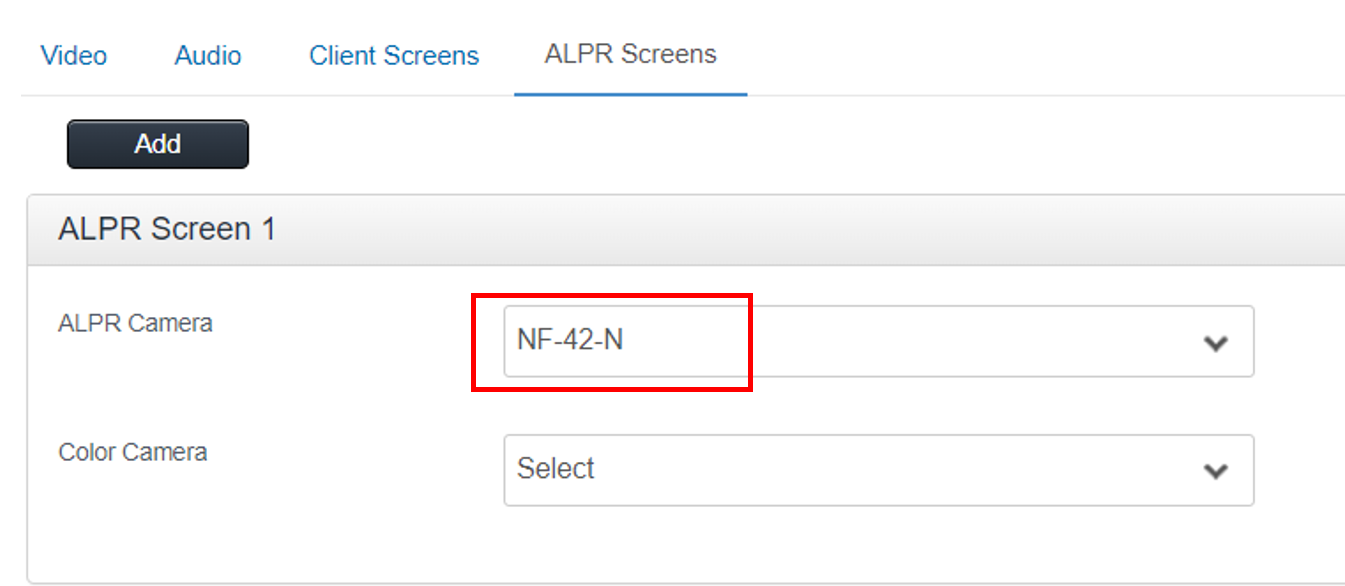
- If using ALPR functionality, click the ALPR Screens tab
- Choose NF-42-N (or whichever name was given to the narrow angle camera) from the dropdown list.
- Click on Save to finalize.

