Mar 07, 2024
 639
639
Note:
This article showcases features that are typically only made available to Administrator roles.
However, since Getac Enterprise is highly configurable, the ability to complete tasks described in this article may be different for each User, depending on policy. Please contact an administrator with all access questions and concerns.
However, since Getac Enterprise is highly configurable, the ability to complete tasks described in this article may be different for each User, depending on policy. Please contact an administrator with all access questions and concerns.
Caution:
Integrations are add-on services and are not included with the standard license. If interested in adding these services pre or post deployment, contact a Getac sales representative for your region.
Caution:
The information listed here is to explain this feature. This is configured by the Getac implementation teams and should NOT be modified without first contacting [email protected]. Getac is not responsible for data loss or interruption of services due to improper configuration of this feature.
Overview
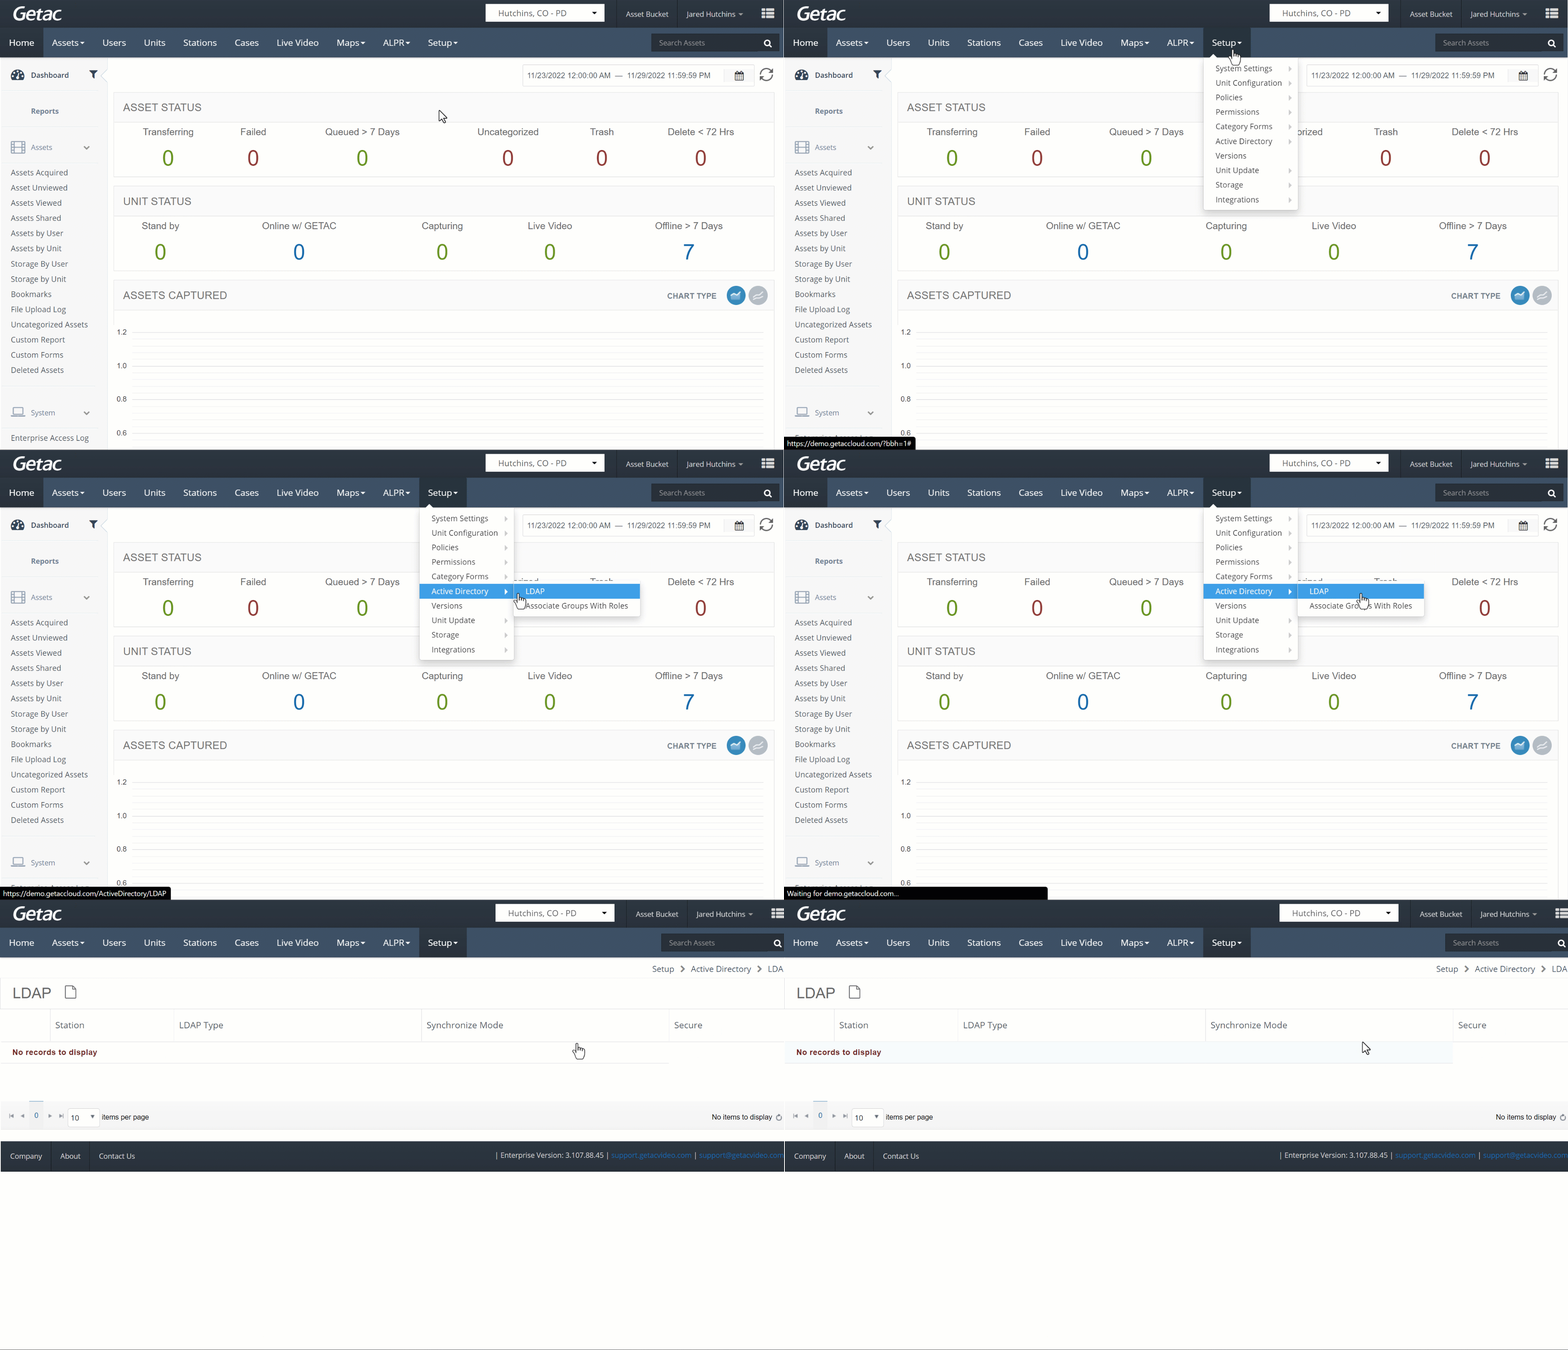
LDAP settings can be configured and managed from Setup > Active Directory > LDAP.
See the image below for how to access the LDAP page:

Add or Modify an LDAP connection
This page allows for creating and managing Station-specific, local or Azure-hosted AD environments and connections.
See image below for an example:

Local LDAP
Perform the following steps to add a new Local LDAP connection:
- Click on the Page icon or select an LDAP connection from the list by clicking on the checkbox to its left, then click the Wrench Icon.
- Add the following parameters:

- AD Type - Select the Local configuration form.
- Station - The station that the LDAP will be associated with.
- LDAP Path - Path to the server for LDAP.
- LDAP Domain - The domain of the LDAP server.
- External Domain - DNS domain for the LDAP server.
- Auth Service URL - URL and port to get authentication information.
- User Name - User Account ID used to access the AD Instance.
- Password - Password used to access the AD instance.
- Confirm Password - Retype the AD account password exactly to confirm accuracy.
- Synchronize Mode - Indicates if the AD connection is established via web service or directly.
- Enable SSL - Indicates if the LDAP connection is secured with SSL.
Azure LDAP
Perform the following steps to add a new Local LDAP connection:
- Create a new registration for tokenized access to Microsoft Graph and add full read permissions to Azure Active Directory.
- Create a new App Registration in Azure Active Directory.
- On the Certificates and secrets page, select New client secret, enter a description, select Expiry rule and click Add.
Caution:Remember to Copy the secret's value before leaving the page, it will only be viewable once.
- On the API permissions page, click Add a Permission > Microsoft Graph > Application Permission, and select Directory > Directory.Read.All.
- If Admin consent is required, follow the on-screen instructions to grant consent.
- In Getac Enterprise, Click on the Page icon or select an LDAP connection from the list by clicking on the checkbox to its left, then click the Wrench Icon.
- Add the following parameters:

- AD Type - Select the Local configuration form.
- Station - The station that the LDAP will be associated with.
- Application Client ID - The unique identifier, provided by Azure, for the a AD instance.
- Directory Tenant ID - The unique identifier, provided by Azure, for the Azure customer (Tenant).
- Client Secret ID - Password String for the Azure AD connection.
Note:
Once an LDAP configuration has been added, it can be modified but cannot be removed from Getac Enterprise. For assistance with AD Integrations, contact [email protected].


