 842
842
However, since Getac Enterprise is highly configurable, the ability to complete tasks described in this article may be different for each User, depending on policy. Please contact an administrator with all access questions and concerns.
Overview
Categories are used to define the type of recording event or incident. This becomes a permanent part of the Metadata and is a searchable field for quickly finding Assets in Getac Enterprise. Once the correct Retention period (policy) has been set up, they can be assigned to the corresponding Category. Additionally, custom forms for capturing Metadata, e.g. CAD event number, license plate, etc. can be created and assigned to specific Categories.
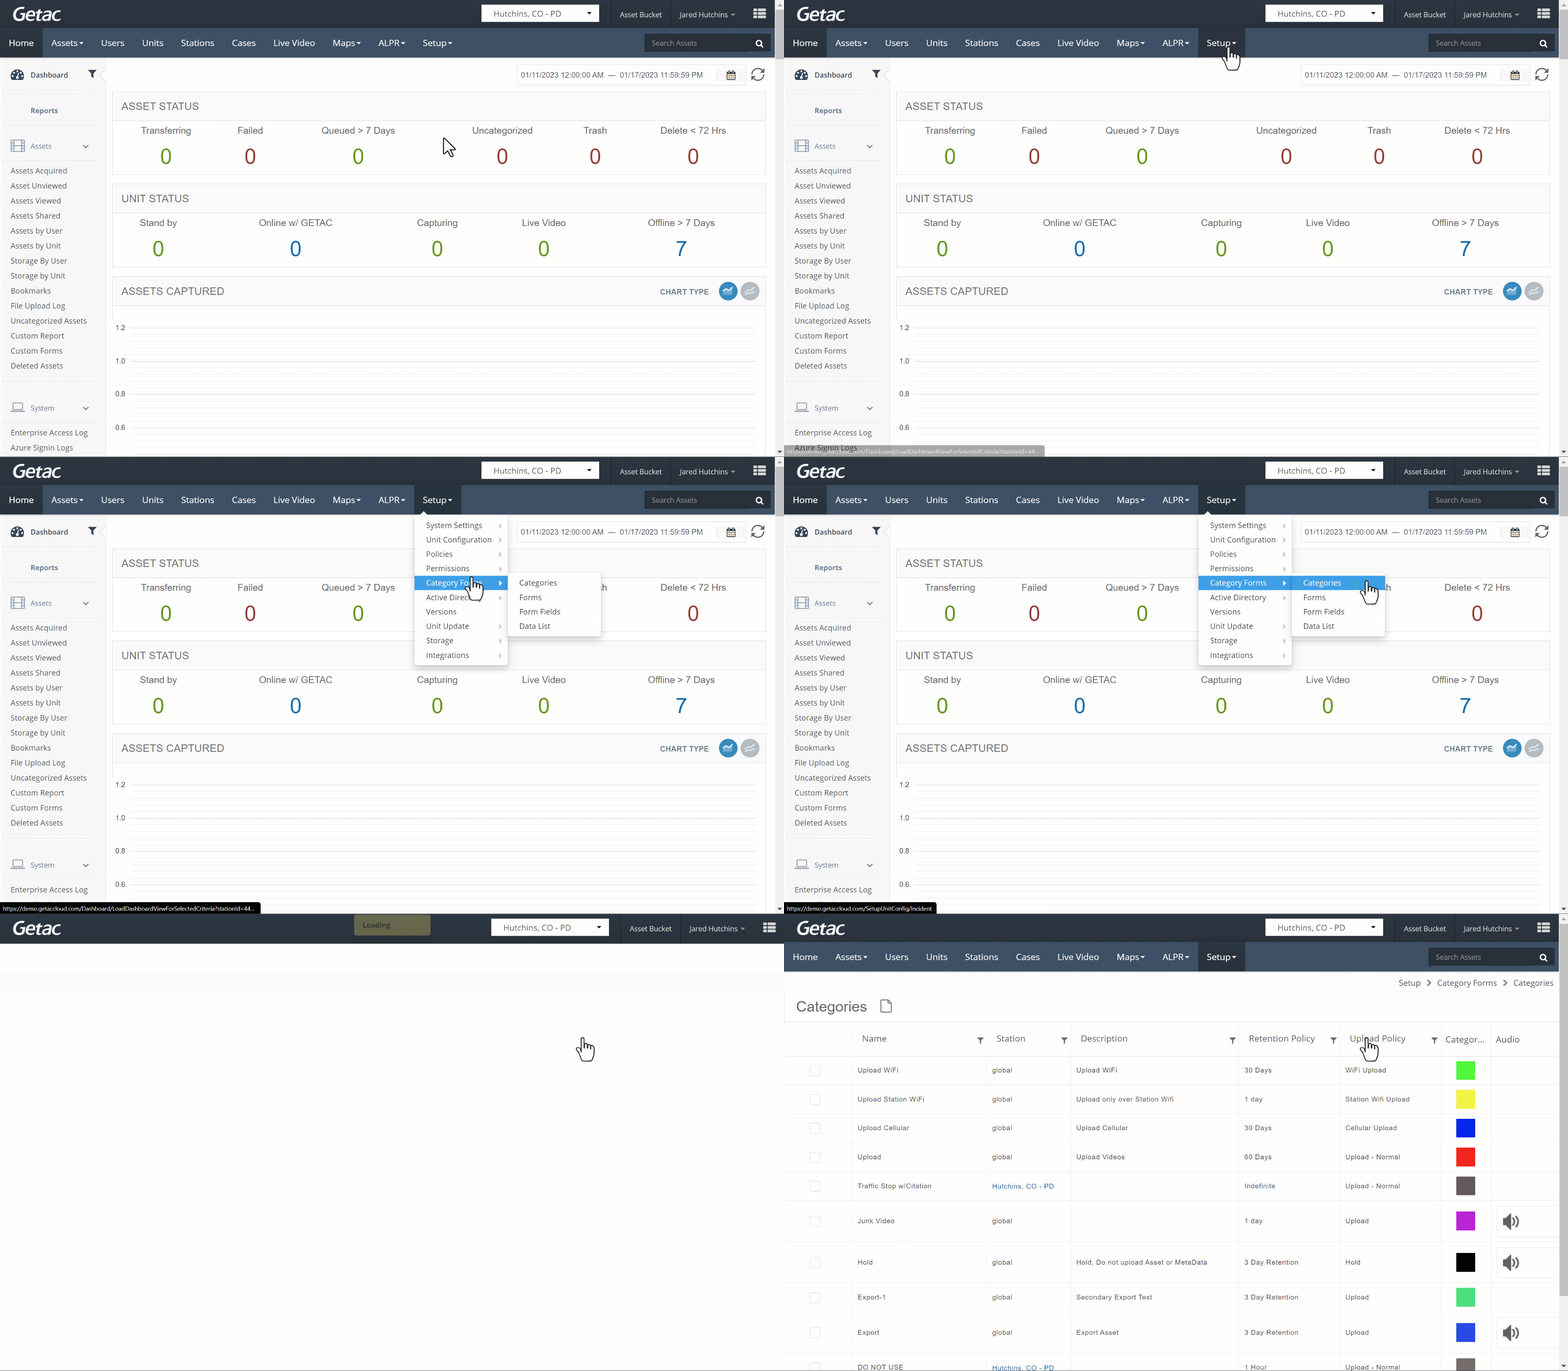
See the image below for how to access the Categories page:

Add or modify existing Category
Perform the following steps:
- Click on the Page icon or select a Category from the list, then click on the Wrench icon.

- On the Category Detail page, provide the following:
- Station - Select which Station the template will be used with. Select “Global” to apply the configuration to all Stations in the station group.
- Name - Enter the name of the Category as it will appear in all Category labels, metadata tags, and Category selection lists.
- Description - Provide a detailed description of the intention, scope, and use for this Category.
- Retention Policy - Required. Select a Retention Policy.
- Upload Policy - Required. Select an Upload Policy.
- Forms - Optional. Select one or more category form(s) to be associated with the Category. To remove a form, click the X icon next to the form name.
- Color - Use the color selector tool to pick a color assigned to the Category. The Category color is used for the legend tag and map pin on the analytics map. Colors must be unique for each Category.
See the image below for an example:

Add Audio file to BWC Categories
To add audio files to Categories being used on a BWC Category wheel, perform the following steps:
- Select a Category from the list, then click on the Speaker icon.

- Click on the Add button and browse to the desired audio file location and select it.

- Click on Submit to finalize.
See the specific device Unit Configuration page for how to apply Categories to a template.


