User Groups

Mar 07, 2024
 954
954
Note:
This article showcases features that are typically only made available to Administrator roles.
However, since Getac Enterprise is highly configurable, the ability to complete tasks described in this article may be different for each User, depending on policy. Please contact an administrator with all access questions and concerns.
However, since Getac Enterprise is highly configurable, the ability to complete tasks described in this article may be different for each User, depending on policy. Please contact an administrator with all access questions and concerns.
Note:
Items covered in this section are informative only and do NOT explain how to set up each agency's specific permissions. Many configurations of permissions are possible and unique to each deployment. Contact [email protected] for assistance.
Overview
User Groups define how data is shared between various Users in Getac Enterprise. Multiple groups can be configured that have Users associated with them.
Each group has the following set of permissions:
- Sharing Peers
- Sharing Child
- Sharing Parents
The above sharing options define how the members of a group share data with each other. Group sharing is a powerful mechanism by which the system administrator can define who shares data with whom. Group members can include Users as well as other Groups, i.e. subgroups.
See the image below for how to access the User Group page:
Add or modify an existing User Group
Perform the following steps:
- Click on the Page icon or select a template from the list, then click on the Wrench icon.

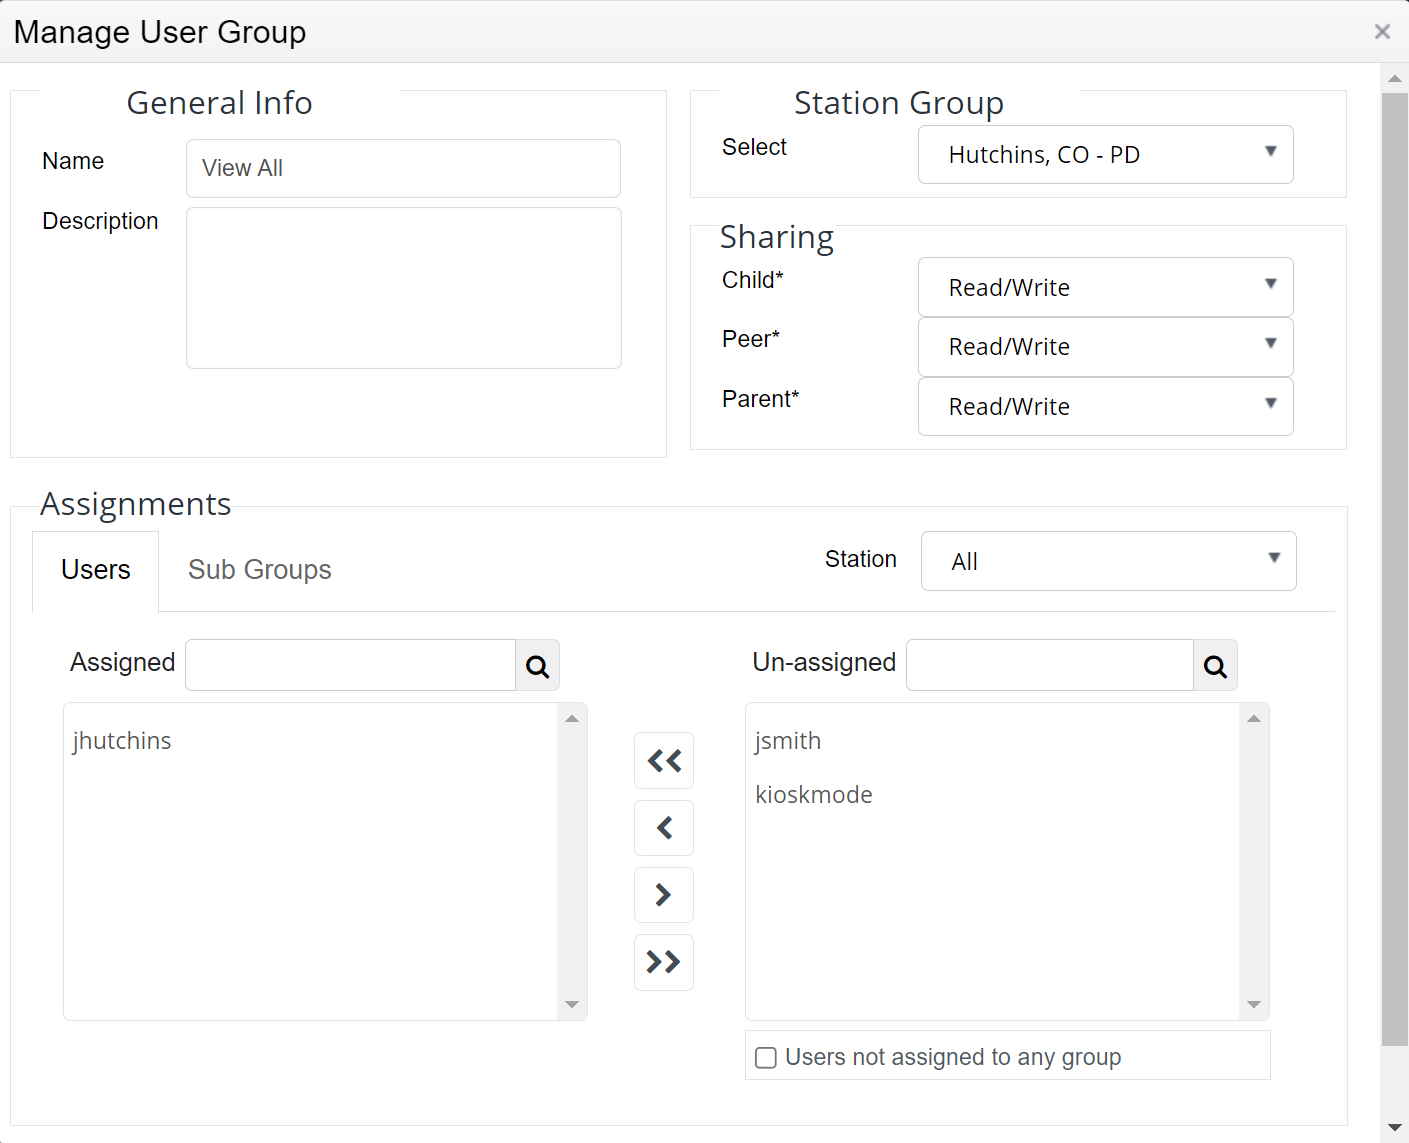
- From the Manage User Group page, provide the following:
- Name - Enter the display name for the user group.
- Description - Provide a detailed description of the user group.
- Station Group - Choose what station group the new user group will be associated with.
- Child - Select which sharing access a group has with child content for the group, e.g. None, Read, Read/Write.
- Peer - Select which sharing access this group has to peer content for the group, e.g. None, Read, or Read/Write.
- Parent - Select which sharing access this group has to parent content for the group, e.g. None, Read, or Read/Write.
- Station - Select if all users in a station group are shown or only a specific station’s users in the assignments section.
- Tabs - Group Assignments can be set to specific user accounts or subgroups.
- Assigned Lookup - Allows you to filter the list of assigned users/subgroups.
- Assigned Pool - Lists all included users/subgroups for the user group.
- Move Tools - These tools allow for swapping users/groups between the assigned and unassigned pools:

Move all unassigned to the assigned pool. 
Move selected unassigned to the assigned pool. 
Move selected assigned back to the unassigned pool. 
Move all assigned back to the unassigned pool. - Un-assigned Lookup - Allows you to filter the list of unassigned users/subgroups pool (list).
- Un-assigned Pool - Lists all users/subgroups not included in the user group.
- Not Assigned Filter - Filters the unassigned pool to only show users not associated with any user group.
- Save /Cancel - Commit or Discard changes by using the Create/Save and Cancel buttons.
Note:
Once a User Group has been created, it cannot be deleted however, it can be repurposed or modified to meet the needs typically covered by creating a new group.

