
 1554
1554
However, since Getac Enterprise is highly configurable, the ability to complete tasks described in this article may be different for each User, depending on policy. Please contact an administrator with all access questions and concerns.
Navigation
To access the Unit Configuration Page, perform the following actions:
- Search for the desired Unit from the Main Units Page.
- Check the box to the left of the desired Unit.
- Perform one of two actions:
- Click on the Wrench Icon.
- Click on the Gear Icon, then Configuration.
Once the page loads, configuration options are available.
Devices types include:
- BodyWornGen2 - this refers to the BC-02.
Body Worn Camera Configuration
Unit Template
This dropdown list refers to a configuration that can be reused and assigned to any/all BC-02 units registered to Getac Enterprise. This is covered in Unit Configuration Templates.
If creating a custom configuration unique to this one Unit, select * Custom Config from the dropdown bar, then proceed to make changes. See image below for an example:

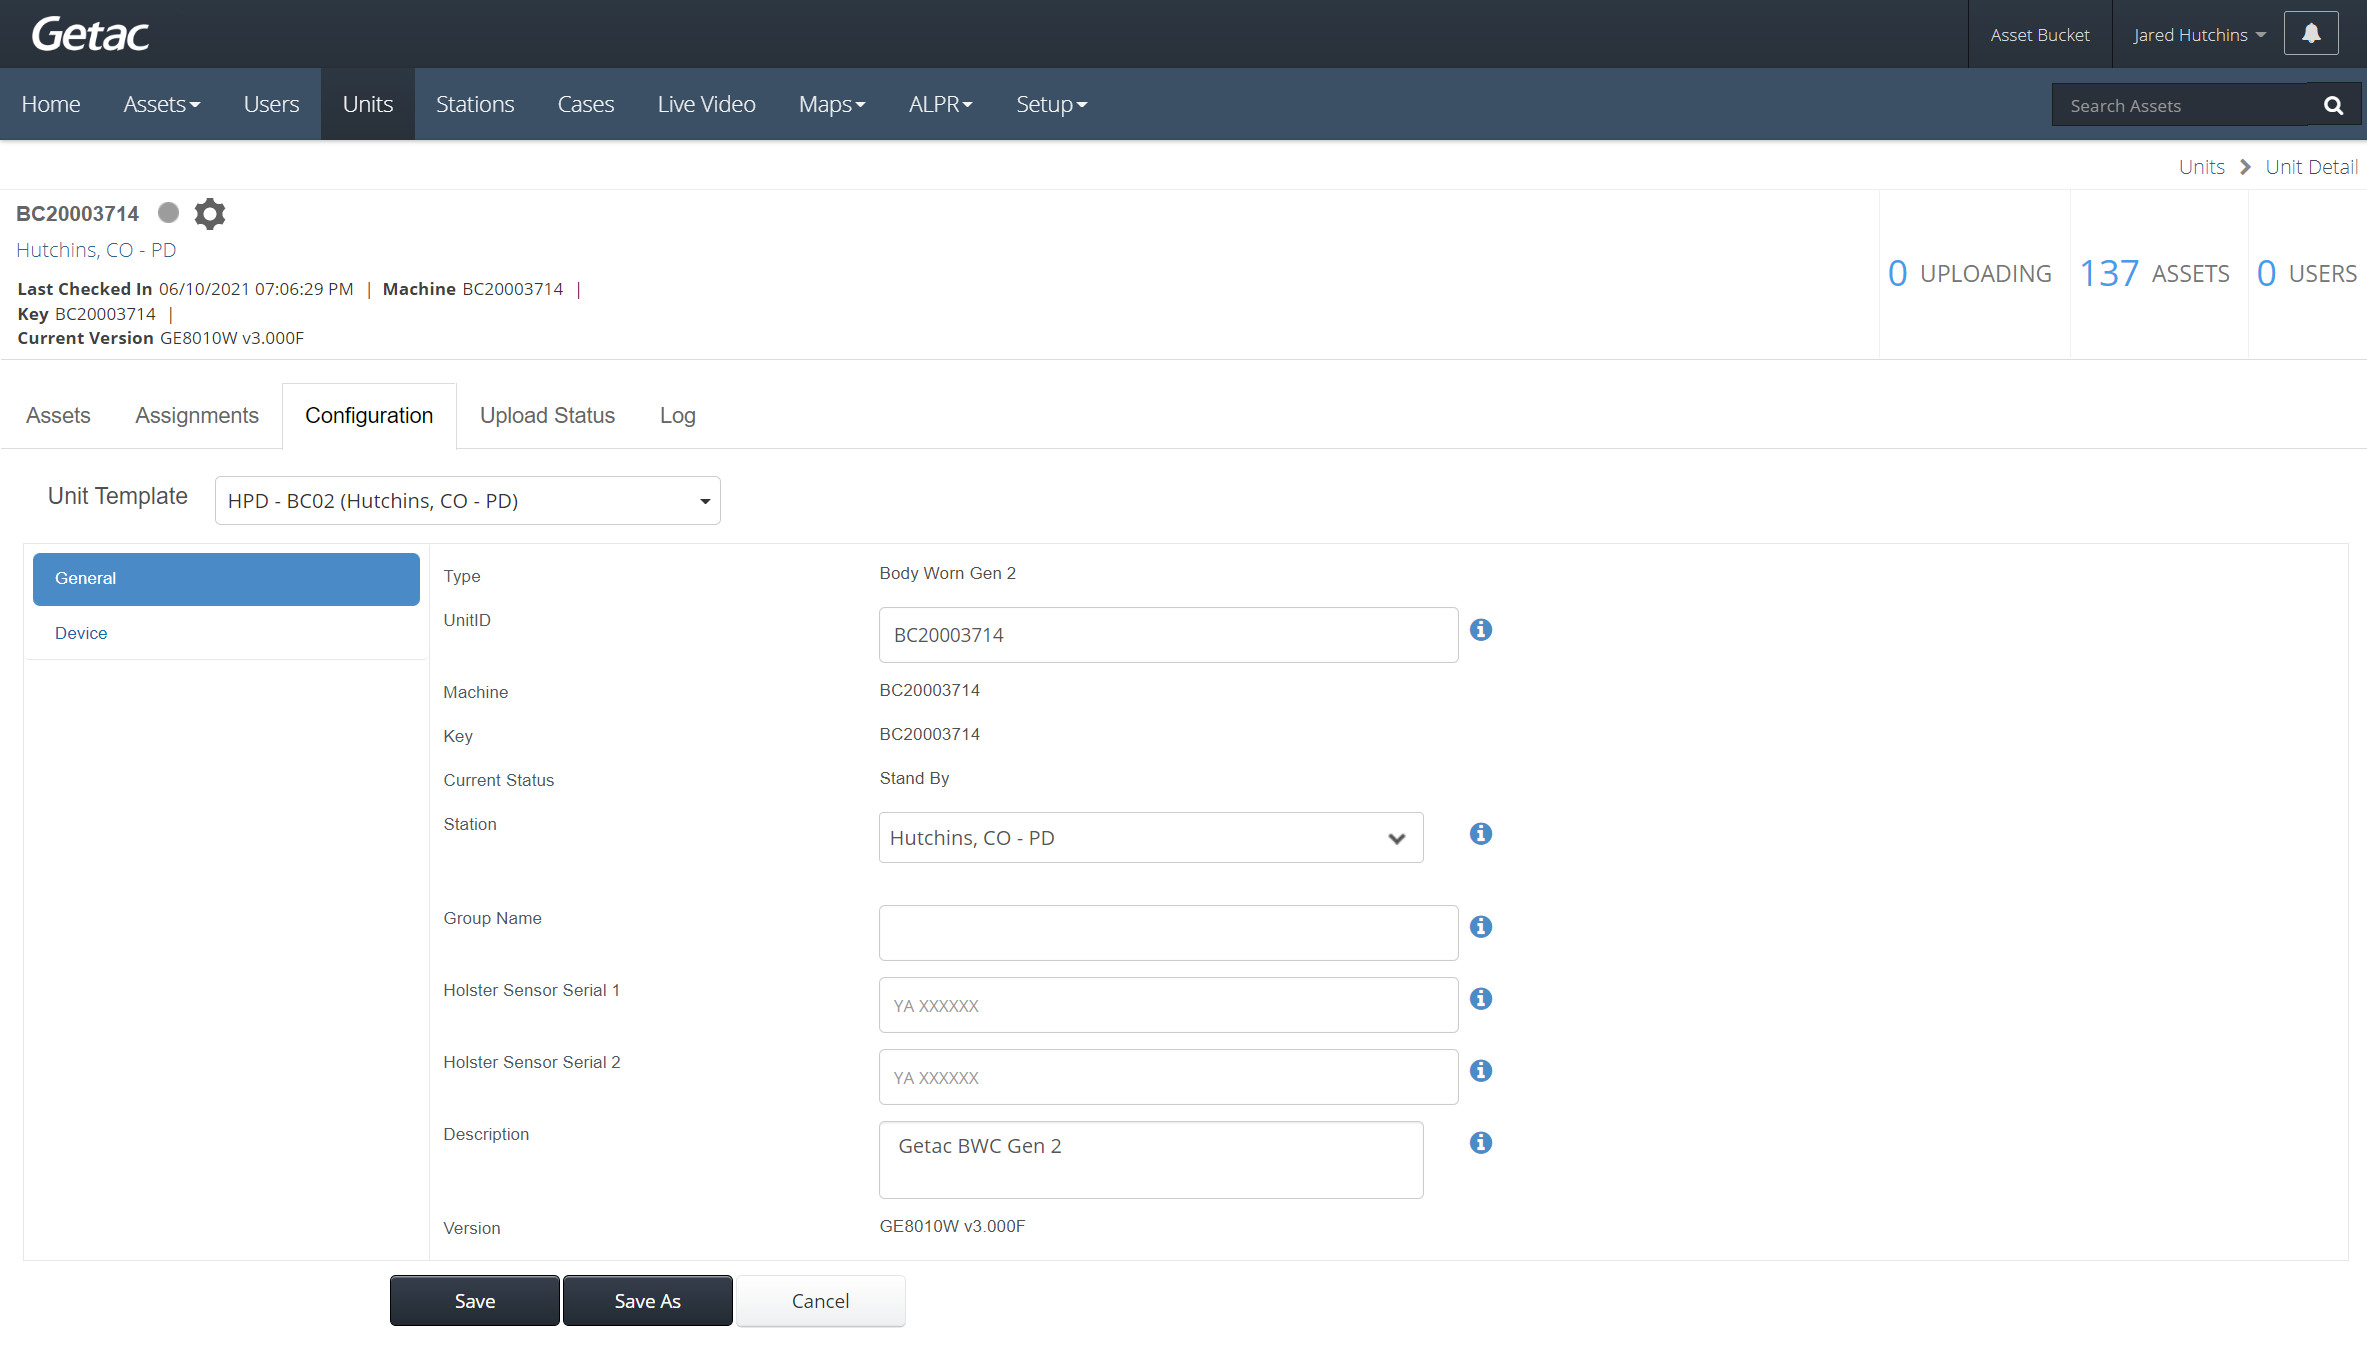
General
This is the default sub-page once the configuration page loads and contains the following options:
- Type - Body Worn Gen 2 (BC-02).
- UnitID - Customizable unique identifier, e.g. badge or employee number.
- Machine - The device's serial number.
- Key - The device's serial number
- Current Status- As follows:
- Unregistered
- Offline
- Recording
- Standby
- Online w/GETAC
- Station - That the Unit is currently registered to.
Note:This can only be changed by a System Administrator. Contact [email protected] for assistance.
- Group Name - Unique ID acquired by a BWC upon docking with an InCar or MasterDock solution. This should match the group name assigned to a TB-02 or TB-03 for integrated MVS/BWC Solutions.
- Holster Sensor Serial 1 - For pistol holster sensor (HS-01).
- Holster Sensor Serial 2 - For pistol holster sensor (HS-01).
- Description - Free text box for adding a custom ID, e.g. precinct number.
- Version - Current firmware version installed.
See image below for an example:
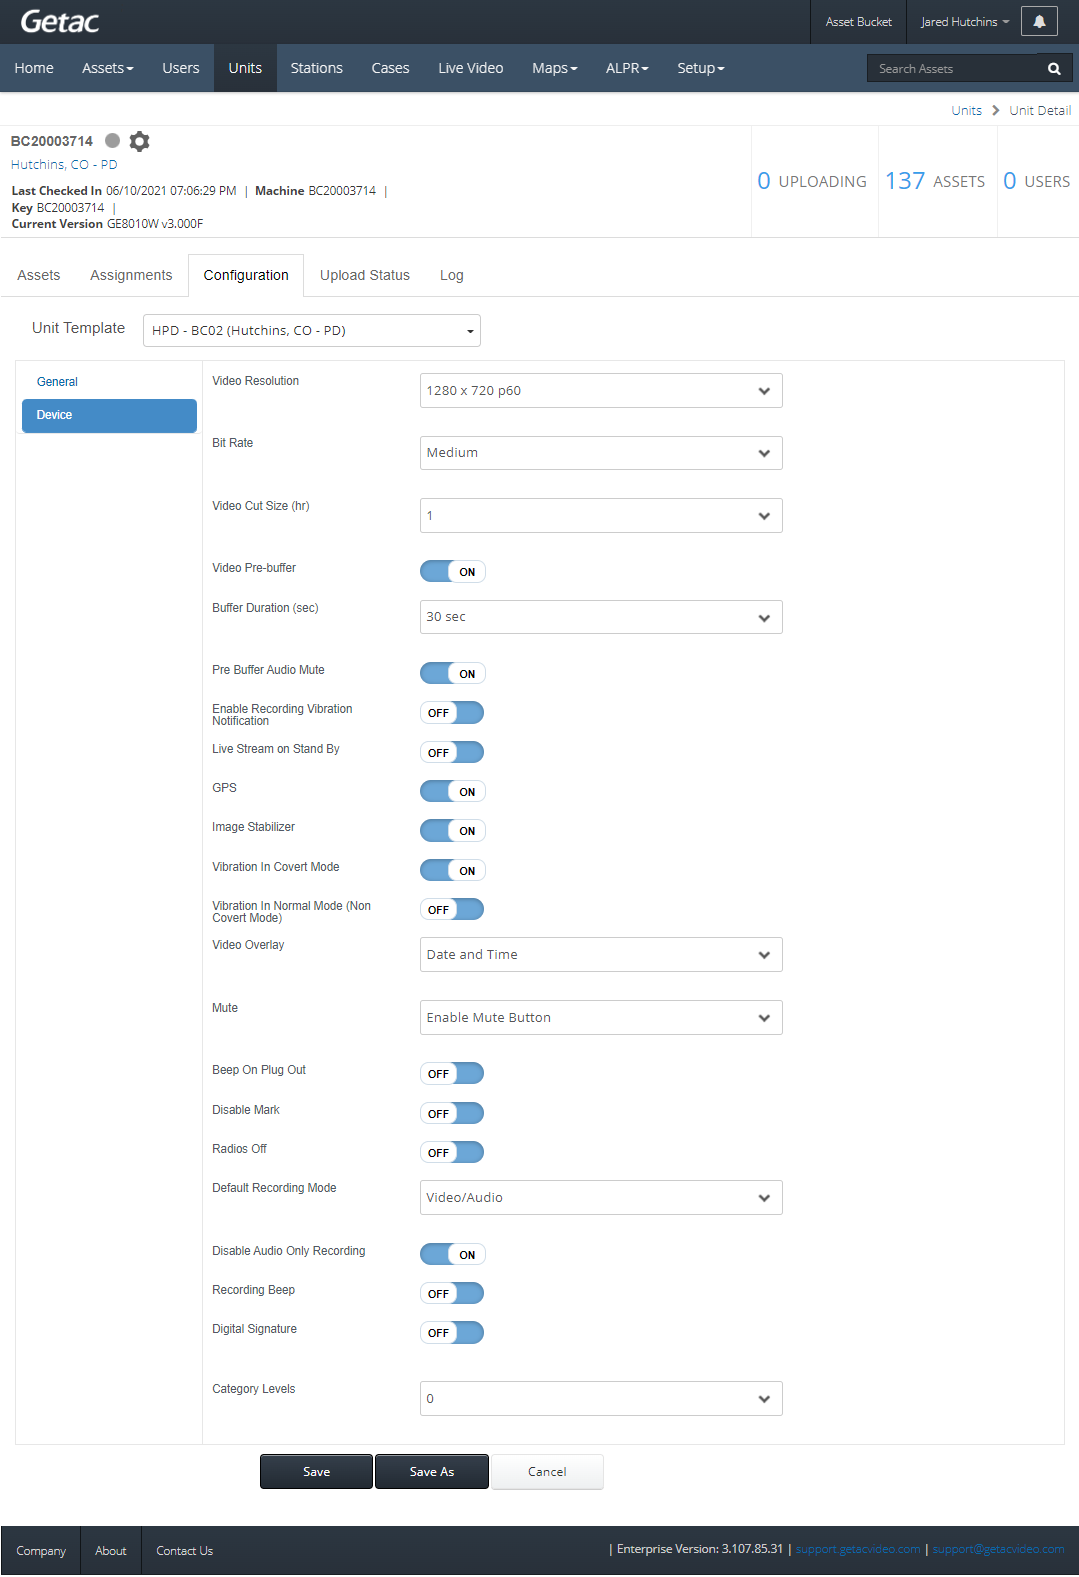
Device
This sub-page contains all hardware-specific configurations for the BC-02 and contains the following options:
- Resolution - Set the BWC capture resolution to one of the following five options:
- VGA 30fps
- 960 x 720 30 fps
- 1280 x 720 30fps
- 1280 x 720 60fps
- 1920 x 1080 30fps
- Bit Rate - Set the video bit rate to High, Medium, or Low.
- Video Cut Size - Sets the recording length (in hours) of all media files before they are divided into new file Segments.
- Video Pre-buffer - Refers to Pre-record; On or Off.
- Buffer Duration - The number of seconds (pre-set to 10, 20, or 30 sec.) prior to the record action, that will be captured in the recording.
- Pre Buffer Audio Mute - Mute audio during Pre-record; On or Off
- Enable Recording Vibration Notification- Vibrate at a selected interval during recording.
- Vibration interval - Value must be between 1 and, 3600 seconds
- GPS - On or Off
- Image Stabilizer - Dynamically smooths out motion for the shaky video to improve image clarity and detail.
- Vibration in Covert Mode - Allows the BWC to physically vibrate for various notifications when placed in Covert Mode.
- Vibration in Normal Mode (Non-Covert Mode) - allow the BWC to physically vibrate for various notifications during normal operation.
- Video Overlay - Embeds a metadata overlay into the recorded video stream. Select the desired data and format for the embedded overlay.
- Mute - Specify the mute action behavior on the BWC.
- Beep on Plug Out - BWC will beep when removed from a charging/offload device.
- Disable Mark - Prevents users from adding bookmarks during recording using the mark button.
- Radios Off - On = turned off; Off = turned on.
- Default Recording Mode - Video/Audio or Audio Only (mic mode)
- Disable Audio Only Recording - Prevents audio-only recordings, forcing the User to always record video.
- Recording Beep - Designed to help remind Users that an active recording is in progress. Specify the interval (in seconds) between an audible beep sound, when a recording is in progress.
- Recording Beep Duration - Value must be between 1 and, 10000 seconds .
- Digital Signature - Designed for self-signing certificates for evidence integrity when recording with the BWC. Upload the appropriate camera certificate and private key.
- Category Levels - Set the number of category levels the BWC category wheel will contain. Each level can hold up to 4 categories. Selecting 0 will disable the category wheel and Asset categorization from the BWC device.
See image below for an example:
Save/Save As
Once the desired configuration parameters have been set, two options are available to save the settings:
- Save:
- If Custom Config is selected from the Unit Template dropdown list, saved settings will apply to only the selected Unit.
- If a Unit Configuration Template is selected from the Unit Template dropdown list, saved settings will apply to all Units with that configuration.
- Save As - Use this feature to create a new template from the selected settings and apply to the selected Unit. This helps avoid accidentally changing the configuration of all Units with an assigned template. This is also helpful when testing one or two changes on an existing template with one Unit.
See the image below for an example:


