 1727
1727
However, since Getac Enterprise is highly configurable, the ability to complete tasks described in this article may be different for each User, depending on policy. Please contact an administrator with all access questions and concerns.
InCar, refers to any solution running the Getac InCar software. This includes MVS, Edge, Interview Room, or other Windows-based systems, e.g. MDT. Some settings listed below are specific to each solution, but share common navigation in Getac Enterprise.
Navigation
To access the UnitConfiguration Page, perform the following actions:
- Search for the desired Unit from the Main Units Page.
- Check the box to the left of the desired Unit.
- Perform one of two actions:
- Click on the Wrench Icon.
- Click on the Gear Icon, then Configuration.
Once the page loads, different configuration options are available and will display depending on the type of device selected.
Devices types include:
- InCar - This type of configuration applies to MVS, Edge, Interview Rooms, and/or any Windows device running the InCar software.
InCar Configuration
Unit Template
This dropdown list refers to a configuration that can be reused and assigned to any/all InCar units registered to Getac Enterprise. This is covered in Unit Configuration Templates.
If creating a custom configuration unique to this one Unit, select * Custom Config from the dropdown bar then proceed to make changes.
See image below for an example:

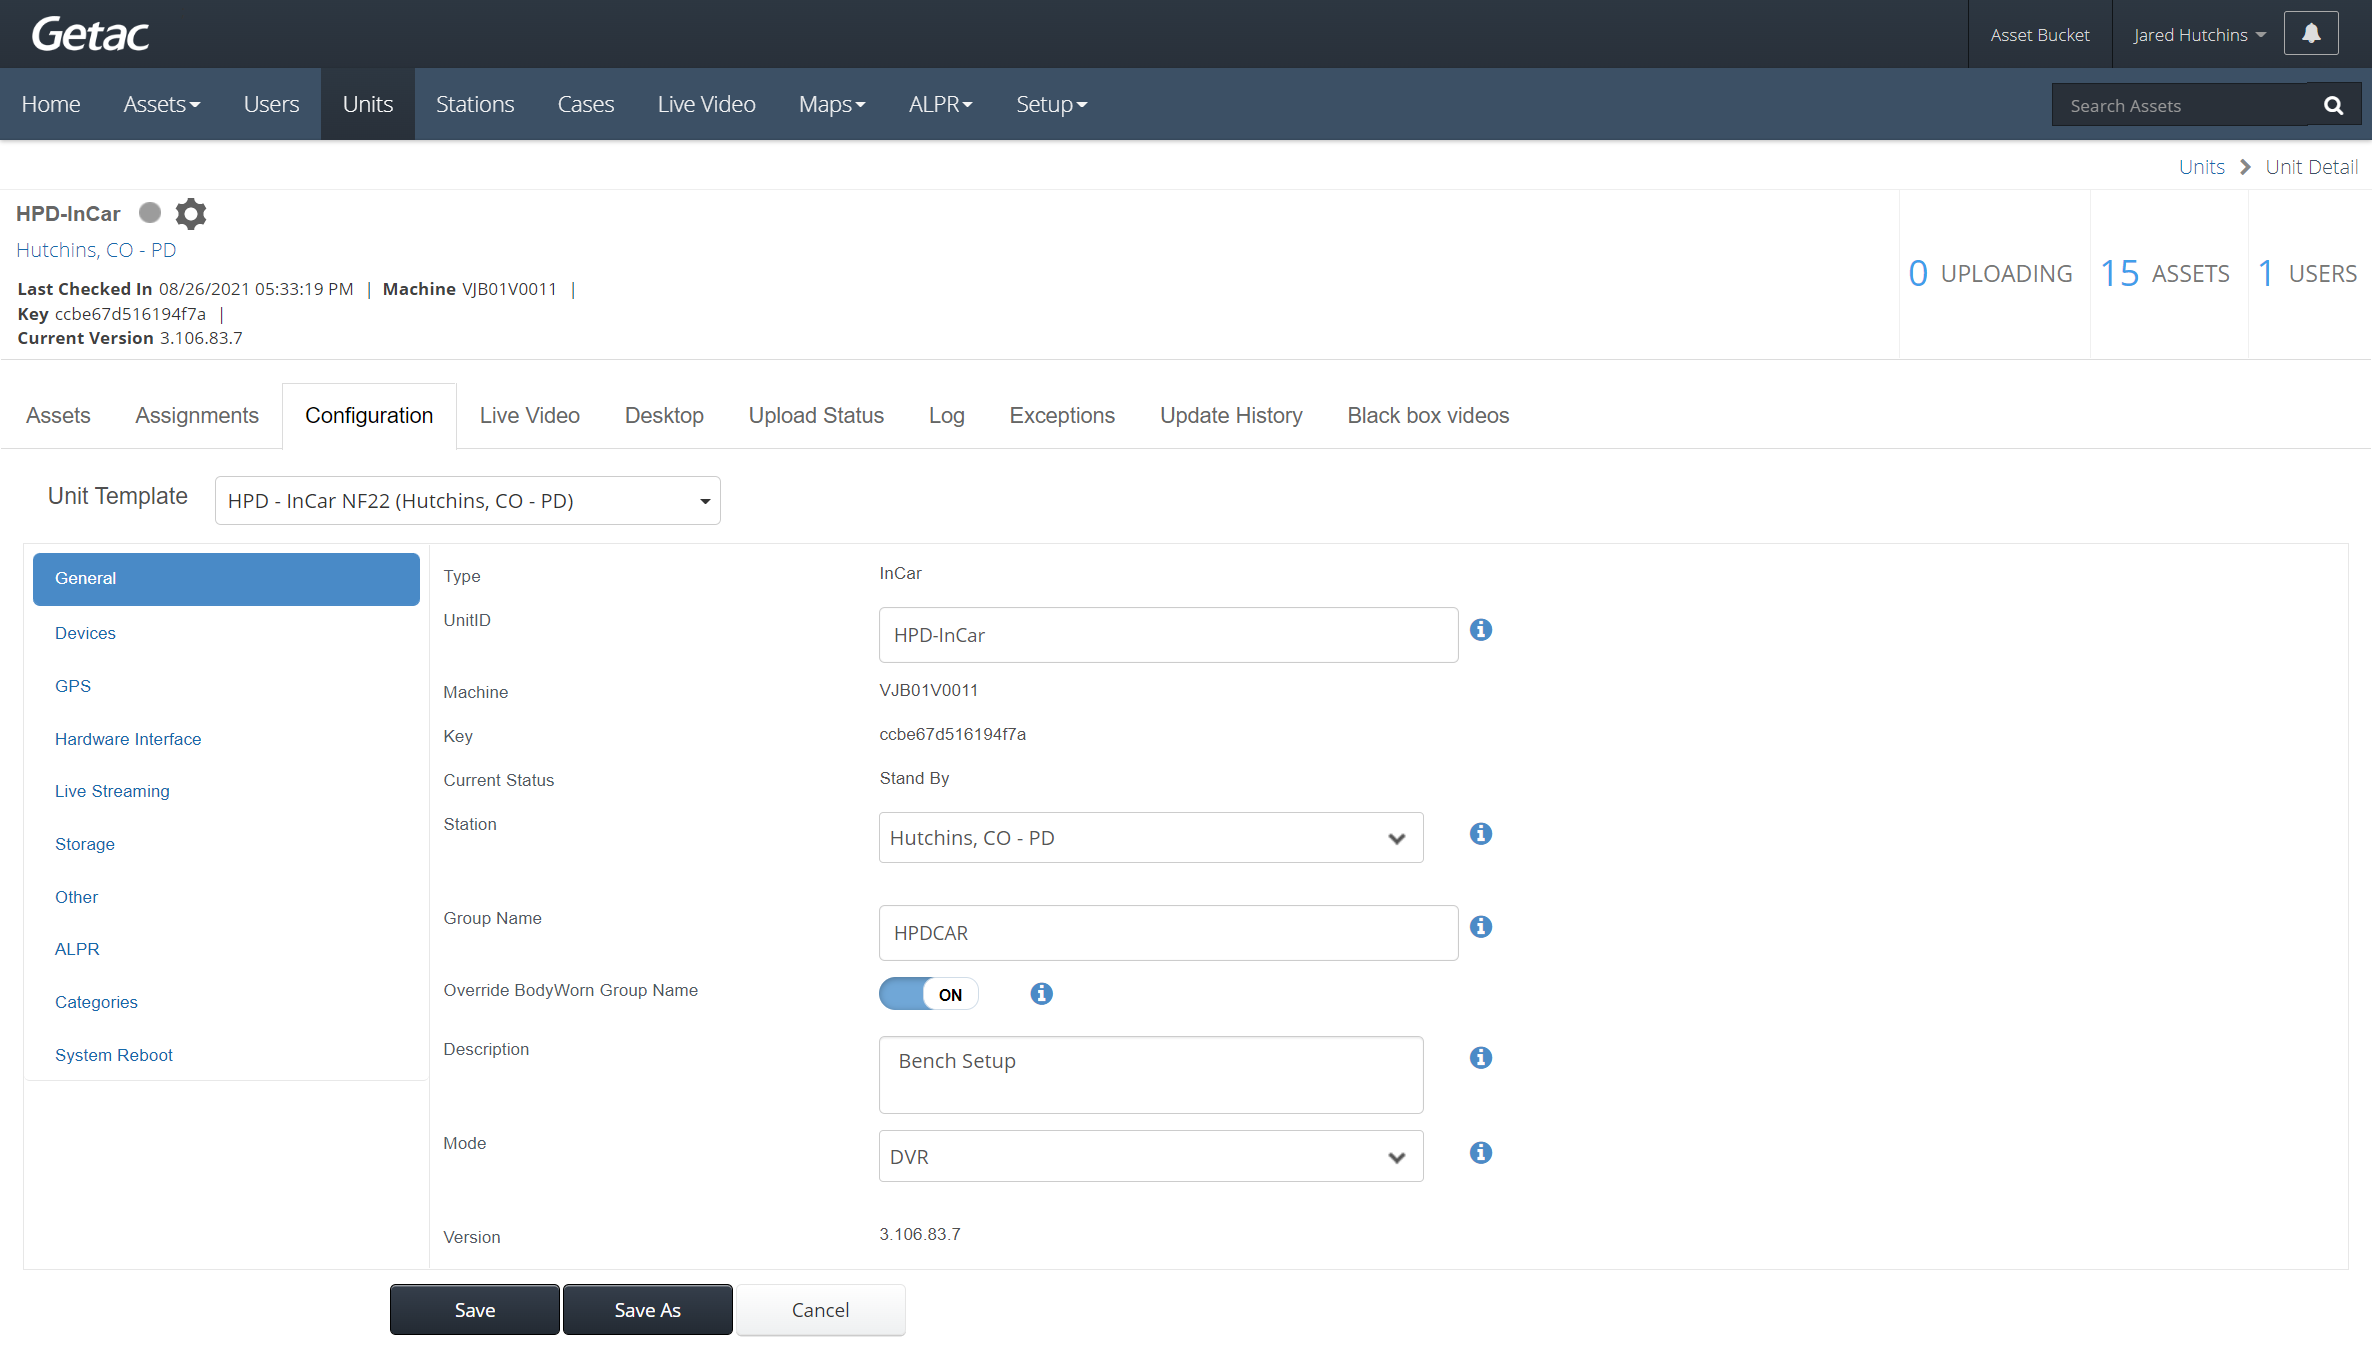
General
This is the default sub-page once the configuration page loads and contains the following options:
- UnitID - Customizable unique identifier, e.g. vehicle number.
- Machine - The device' serial number or PC name if a Windows device.
- Key - Unique device key generated upon registration. Can be used to register a new device as an existing Unit.
- Current Status- As follows:
- Unregistered
- Offline
- Inactive
- Recording
- Standby
- Online w/GETAC
- Station - That the Unit is currently registered to.
- Group Name - Unique ID acquired by a BWC upon docking with an InCar or MasterDock solution. This should match the group name assigned to a TB-02 or TB-03 for integrated MVS/BWC Solutions.
- Override BodyWorn Group Name - This overwrites any group name currently assigned to a docked BWC. Must be turned on to facilitate two-way activation of an MVS/BWC Solution.
- Description - Free text box for adding a custom ID, e.g. year, make, model of vehicle.
- Mode - As follows:
- Car - Set's the application into a PC friendly mode, allowing Users to minimize and maximize the application. This mode tends to be used when the application is running on a PC for mobile interrogation kits.
- Continuous Record - Typically applied in buses and fire apparatus, this mode will continuously record video to the hard drive but will only upload segments activated by triggers. As a DVR reaches capacity, it will begin to overwrite the oldest files.
- DVR - The default mode used for vehicles utilizing the CU-D50. This mode will auto-launch the InCar application and is fixed to a designated ratio, with the intention to complement the CU-D50.
- Version - Current software version installed.
See the image below for an example:
Devices
This sub-page contains three tabs with different settings:
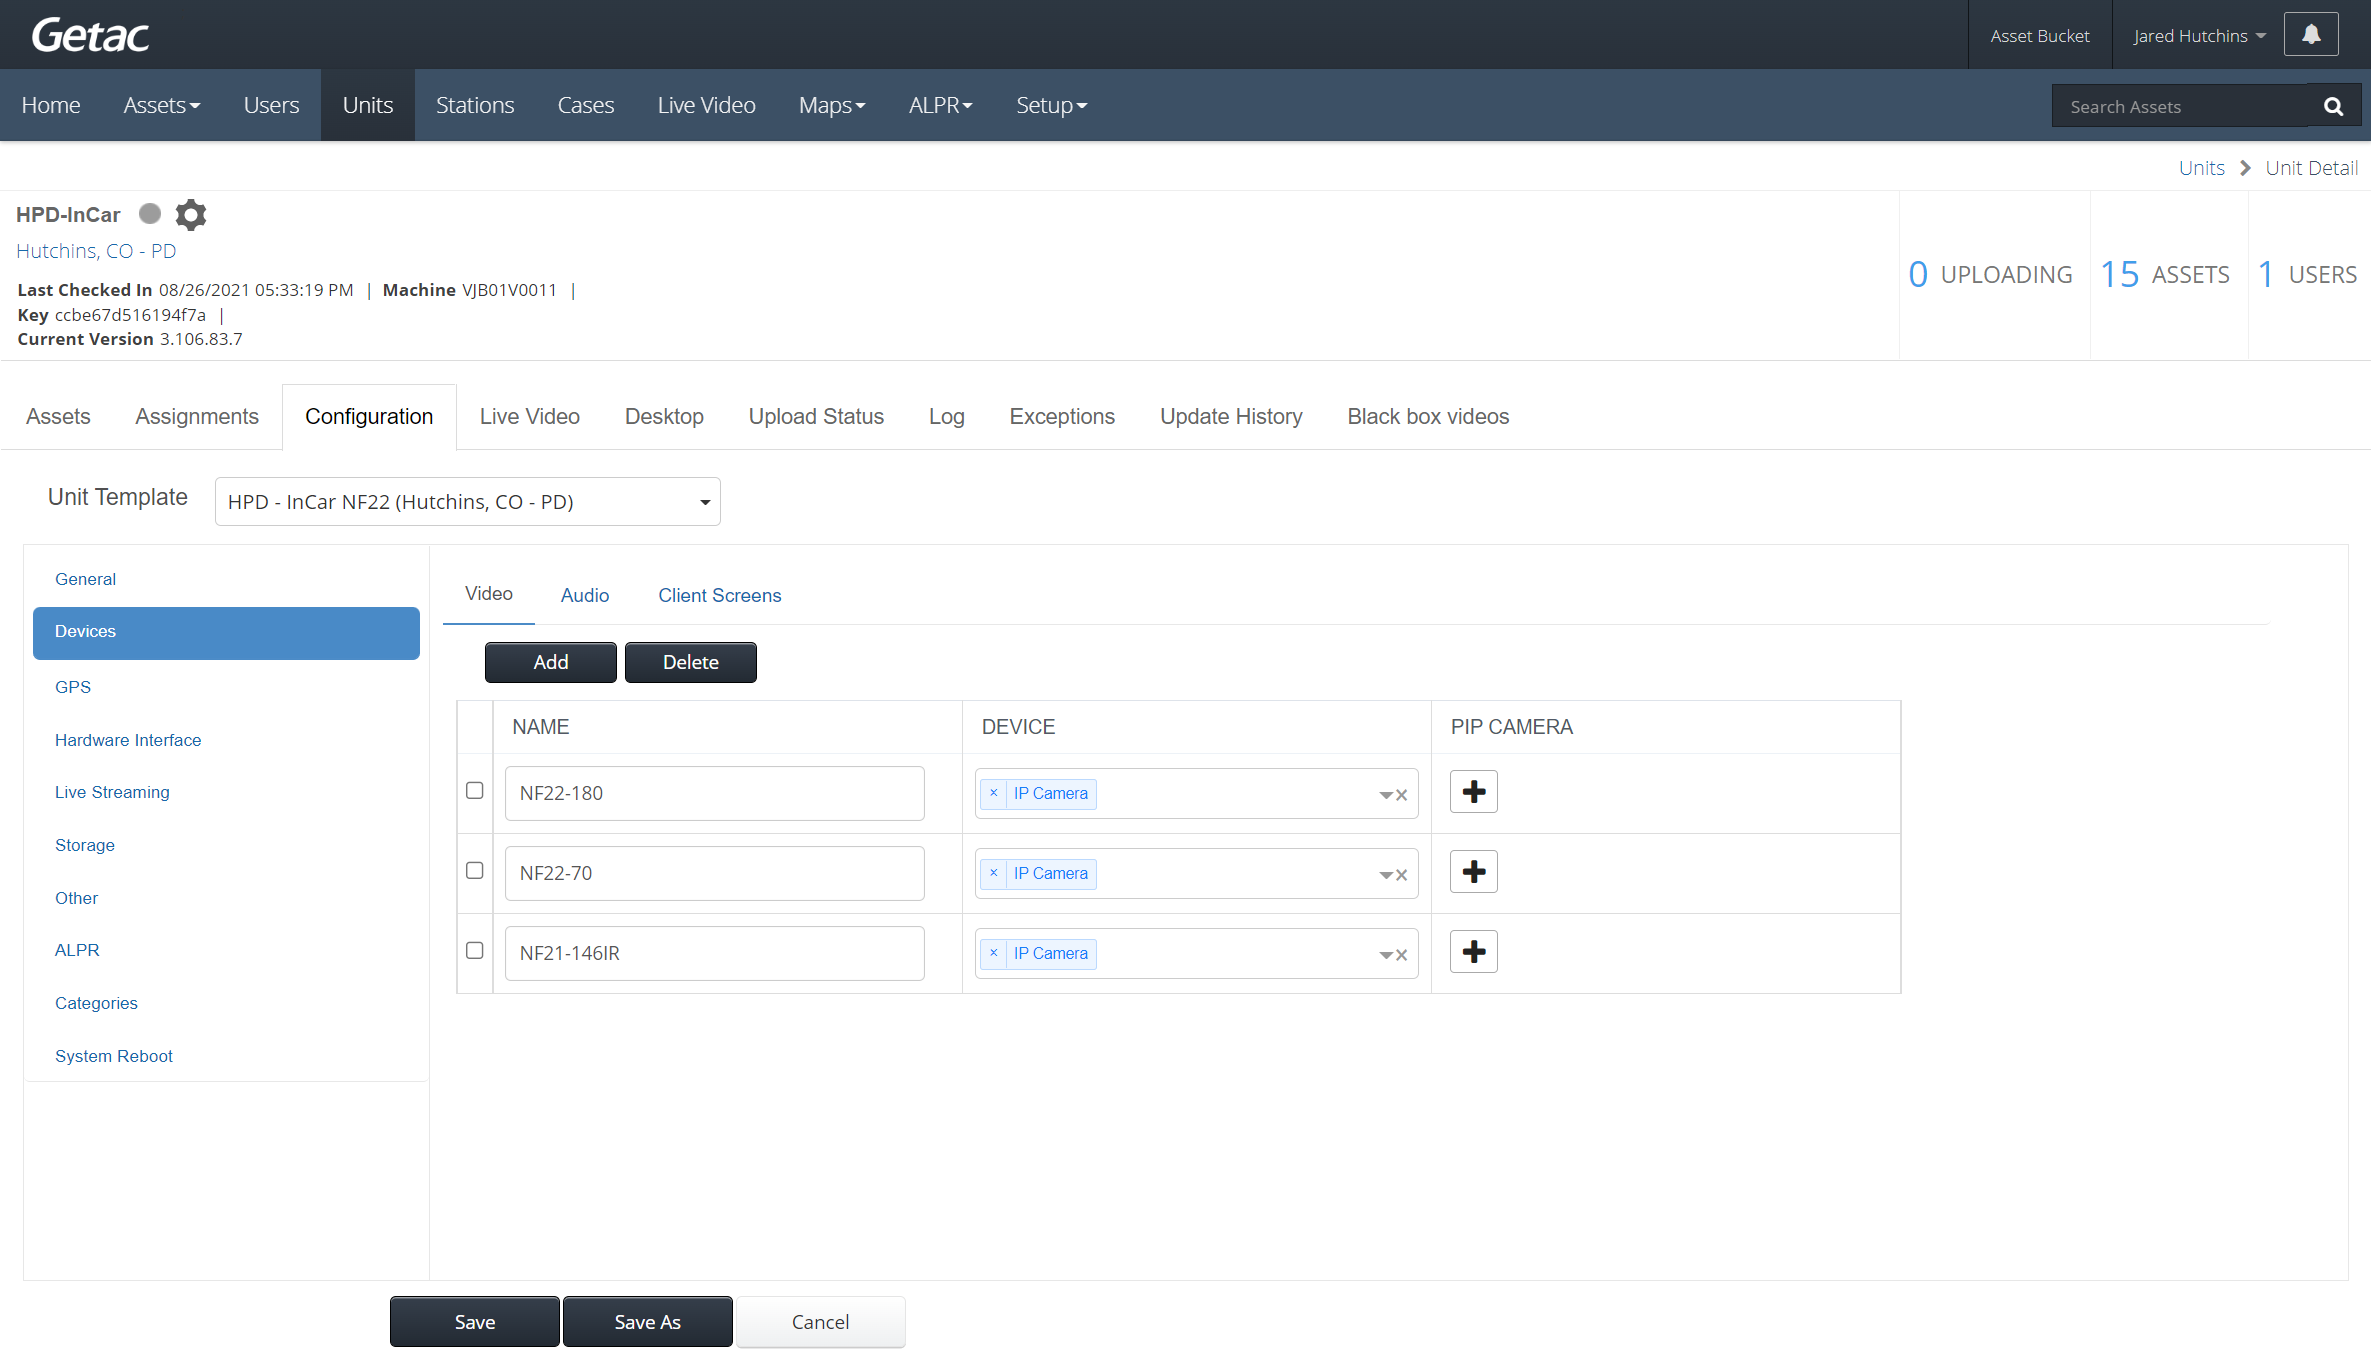
- Video - Allows for configuration of all cameras attached to the DVR and their corresponding PIP if needed.
See image below for an example:
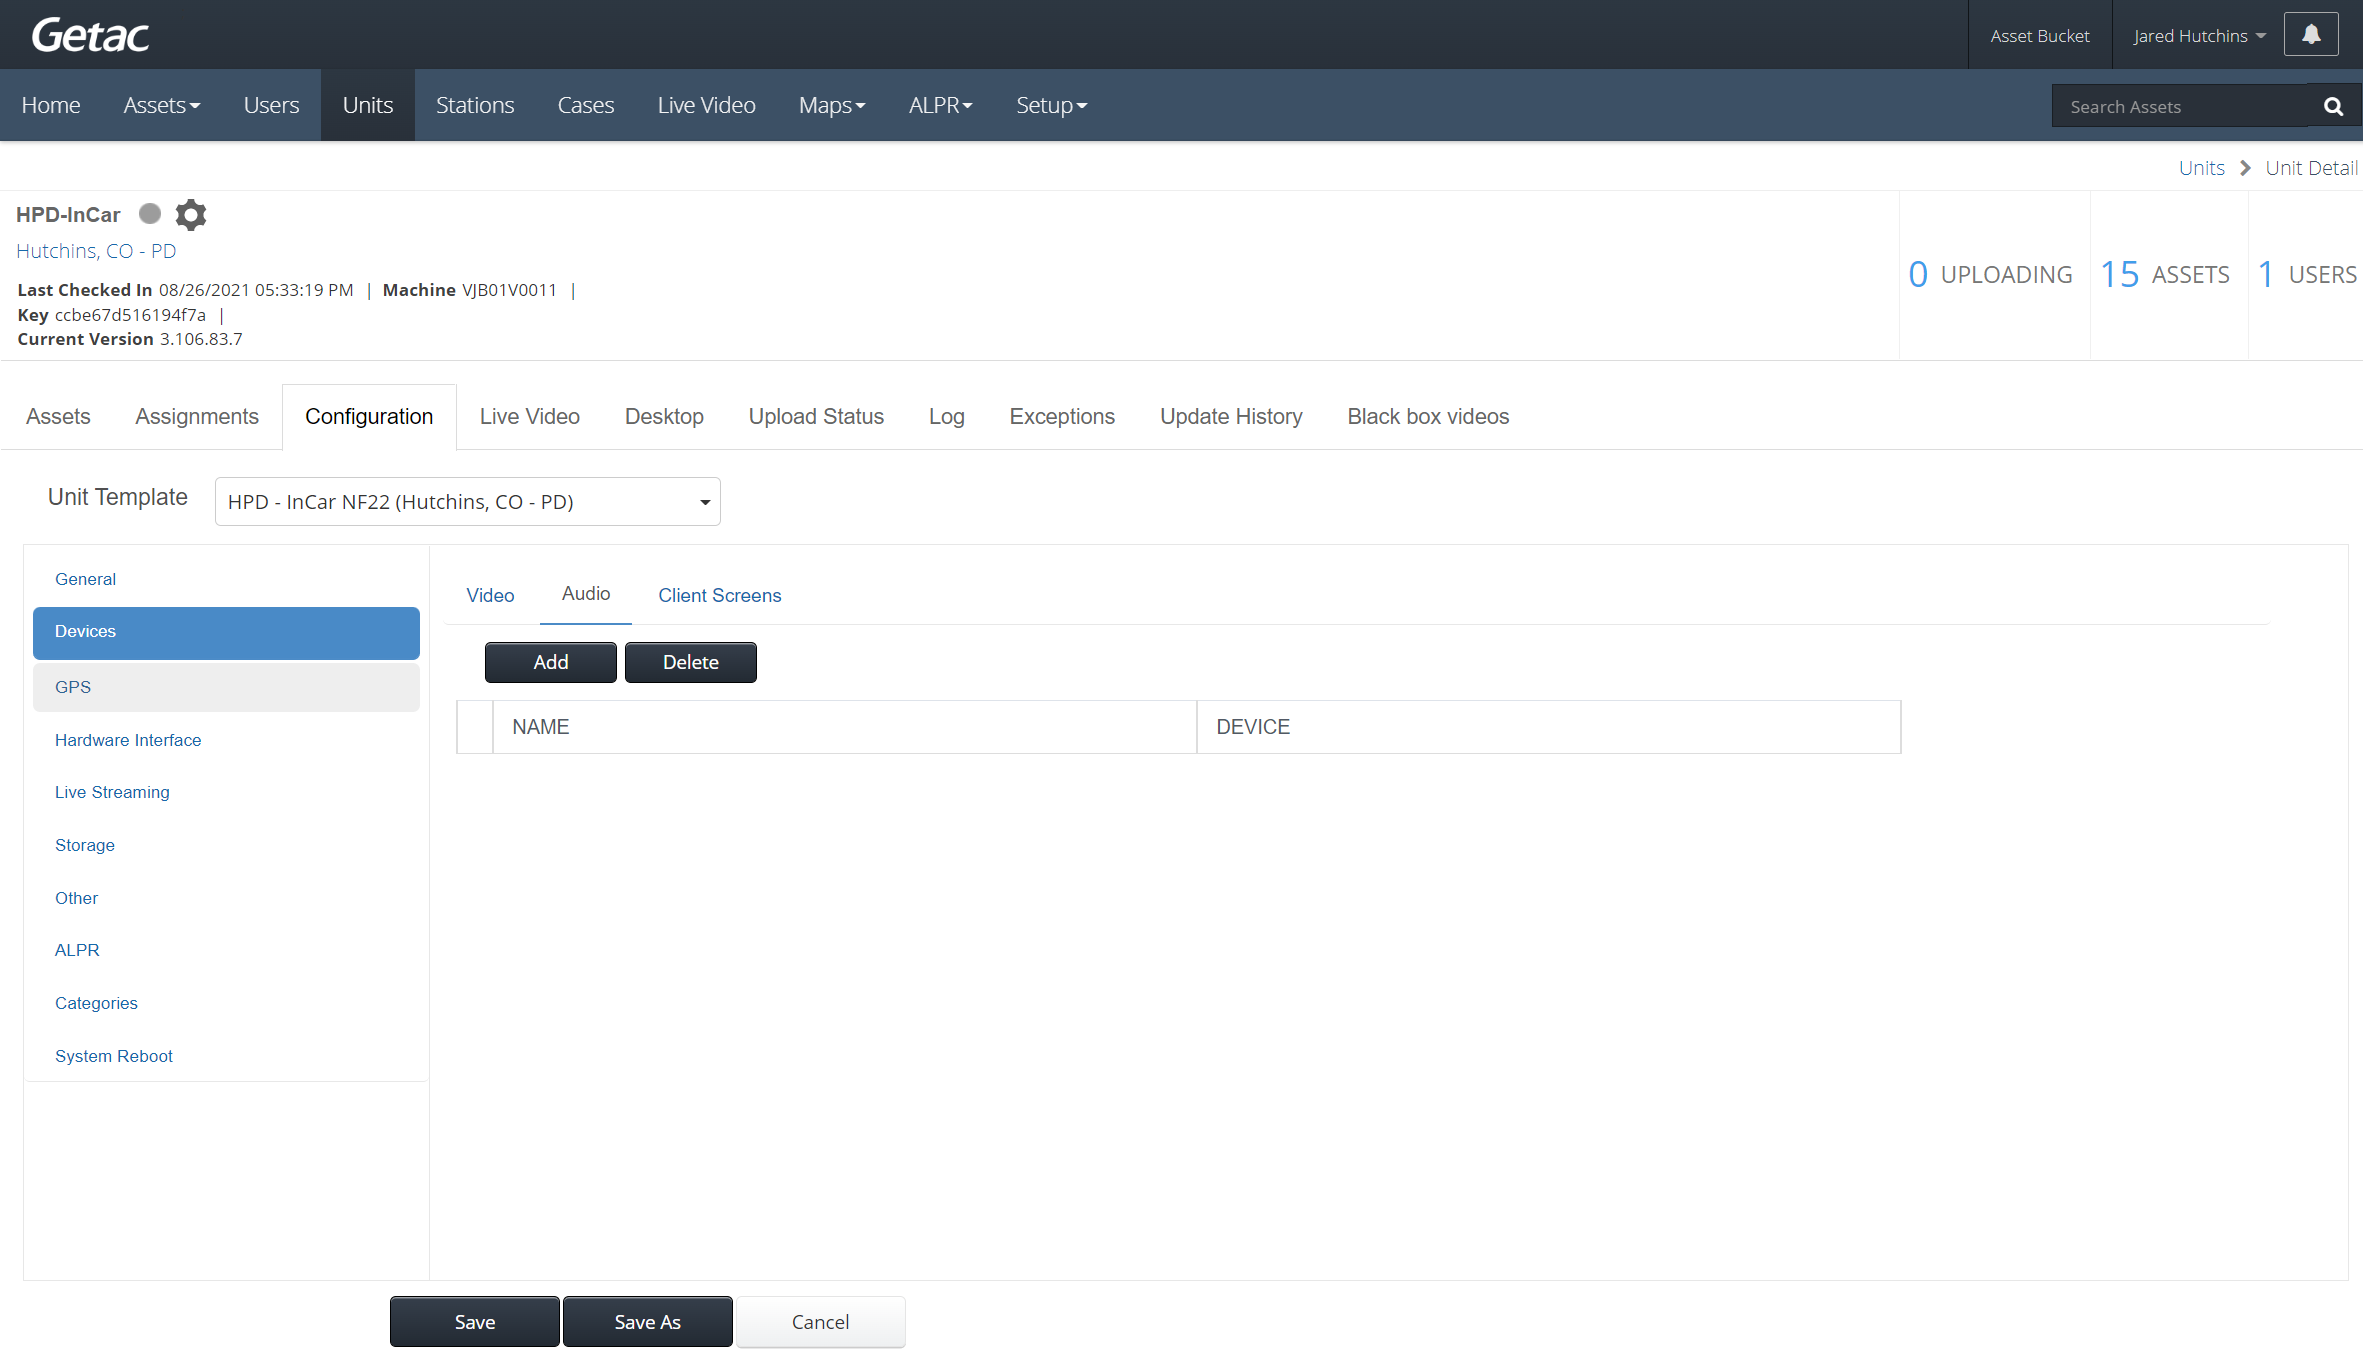
- Audio - Allows for configuration of all microphones attached* to the DVR.
See image below for an example:
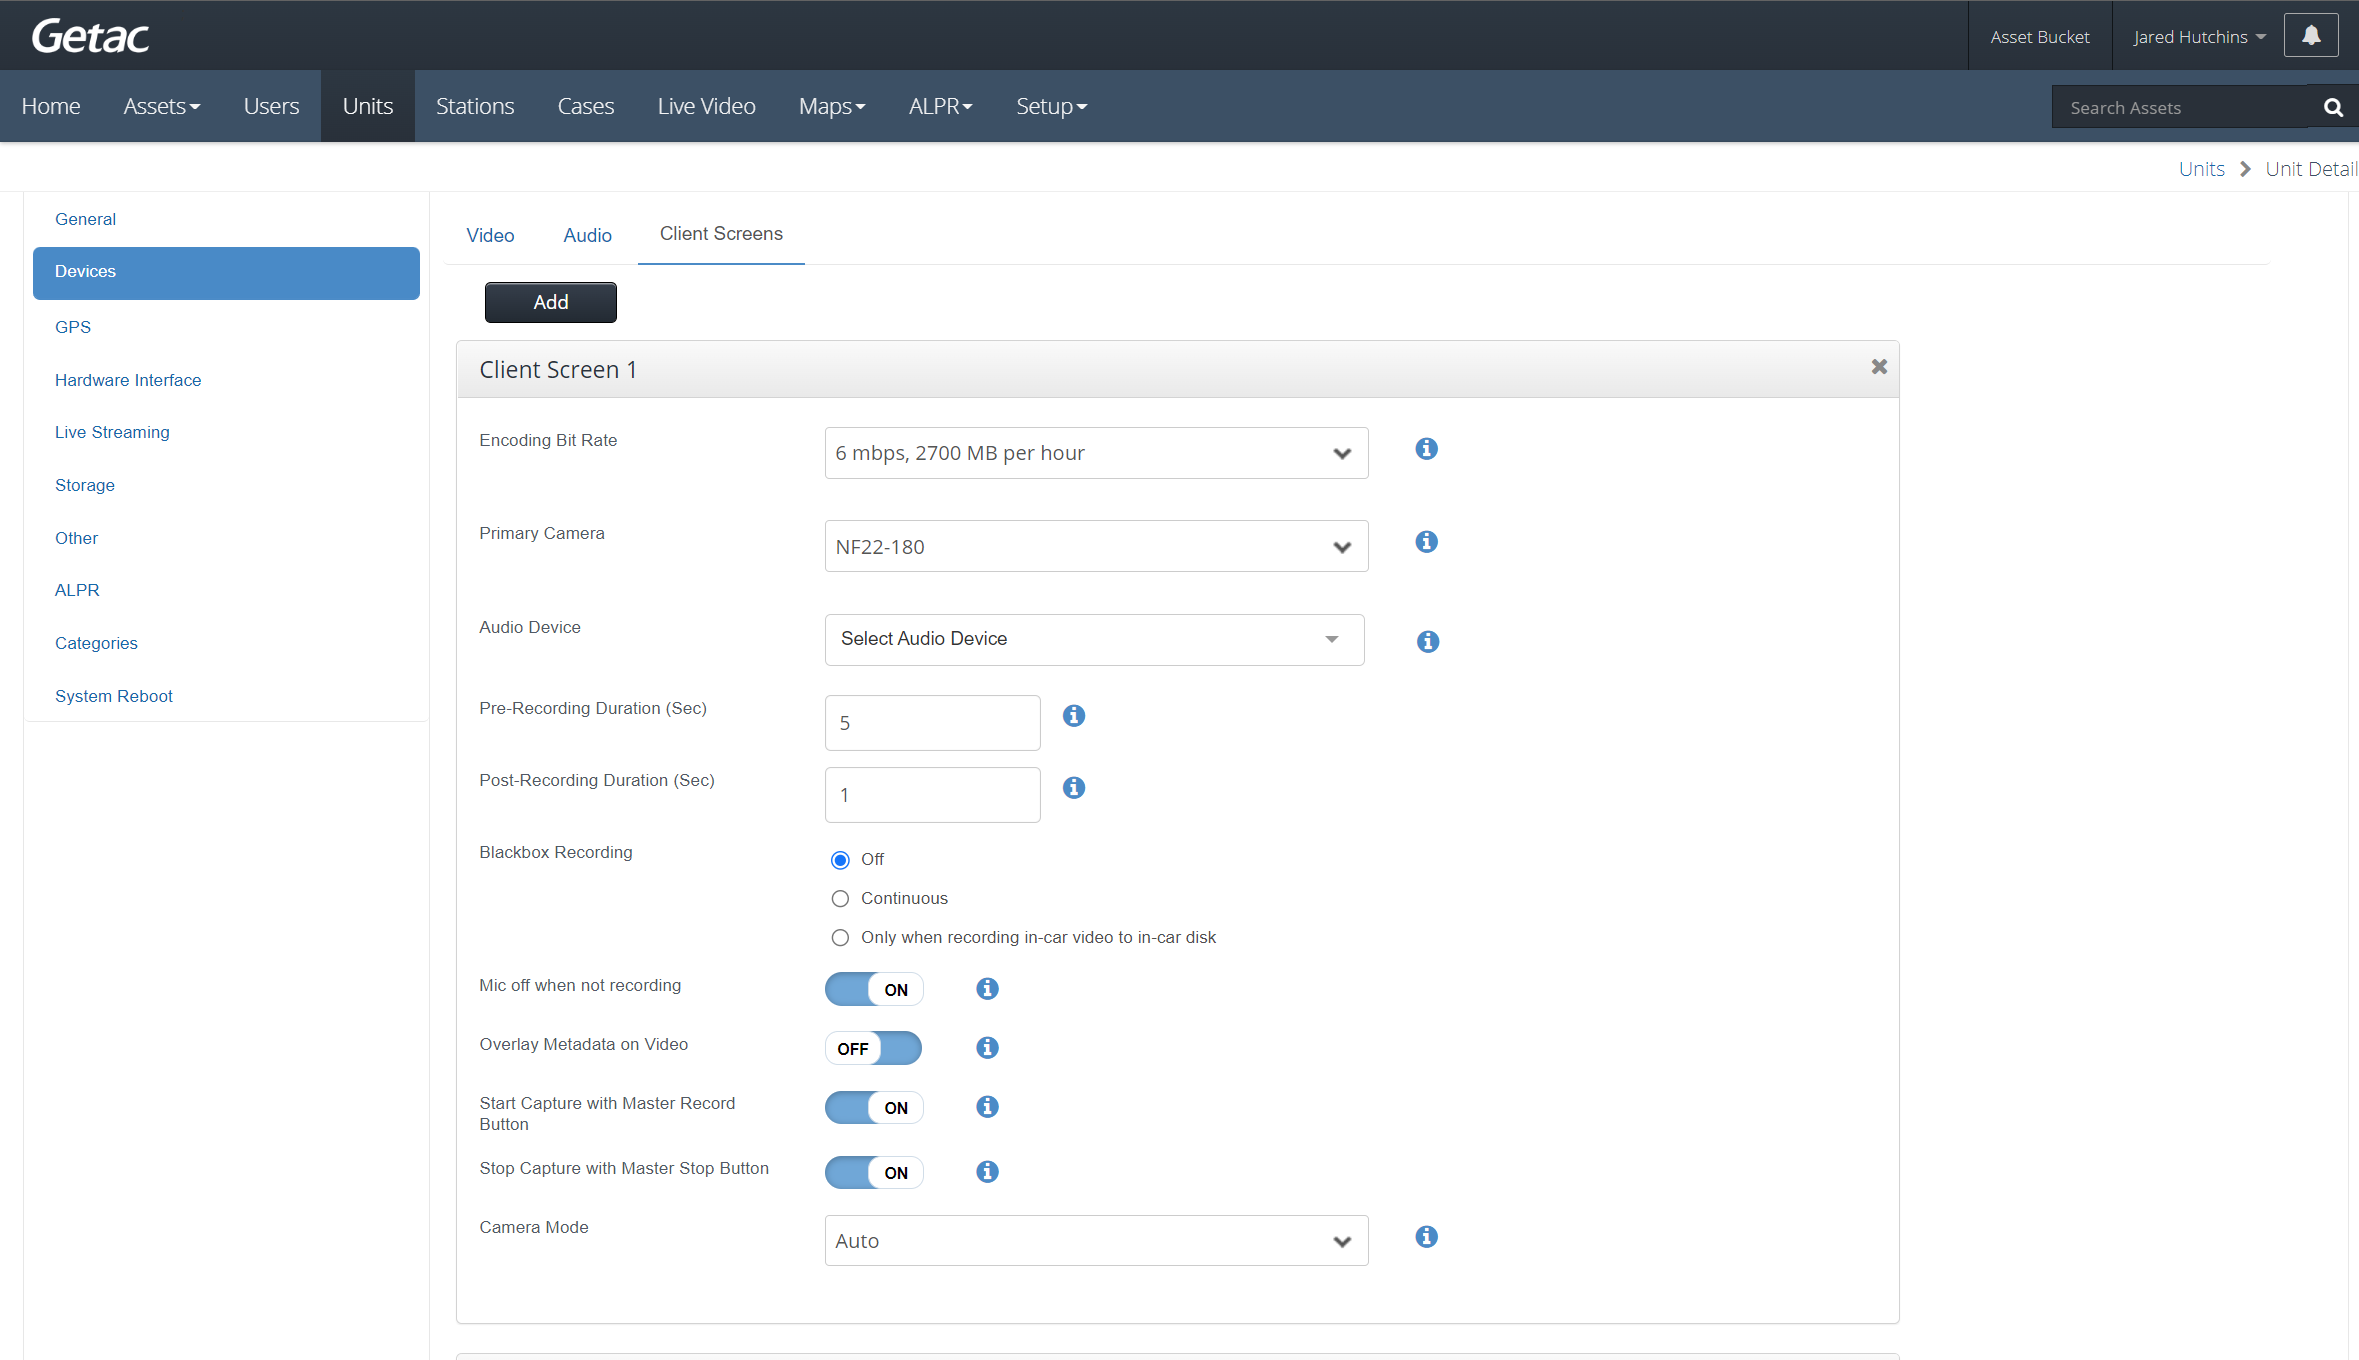
- Client Screens - Defines how the various audio/video devices will be viewed from the Video Capture page in the InCar application.
See image below for an example:
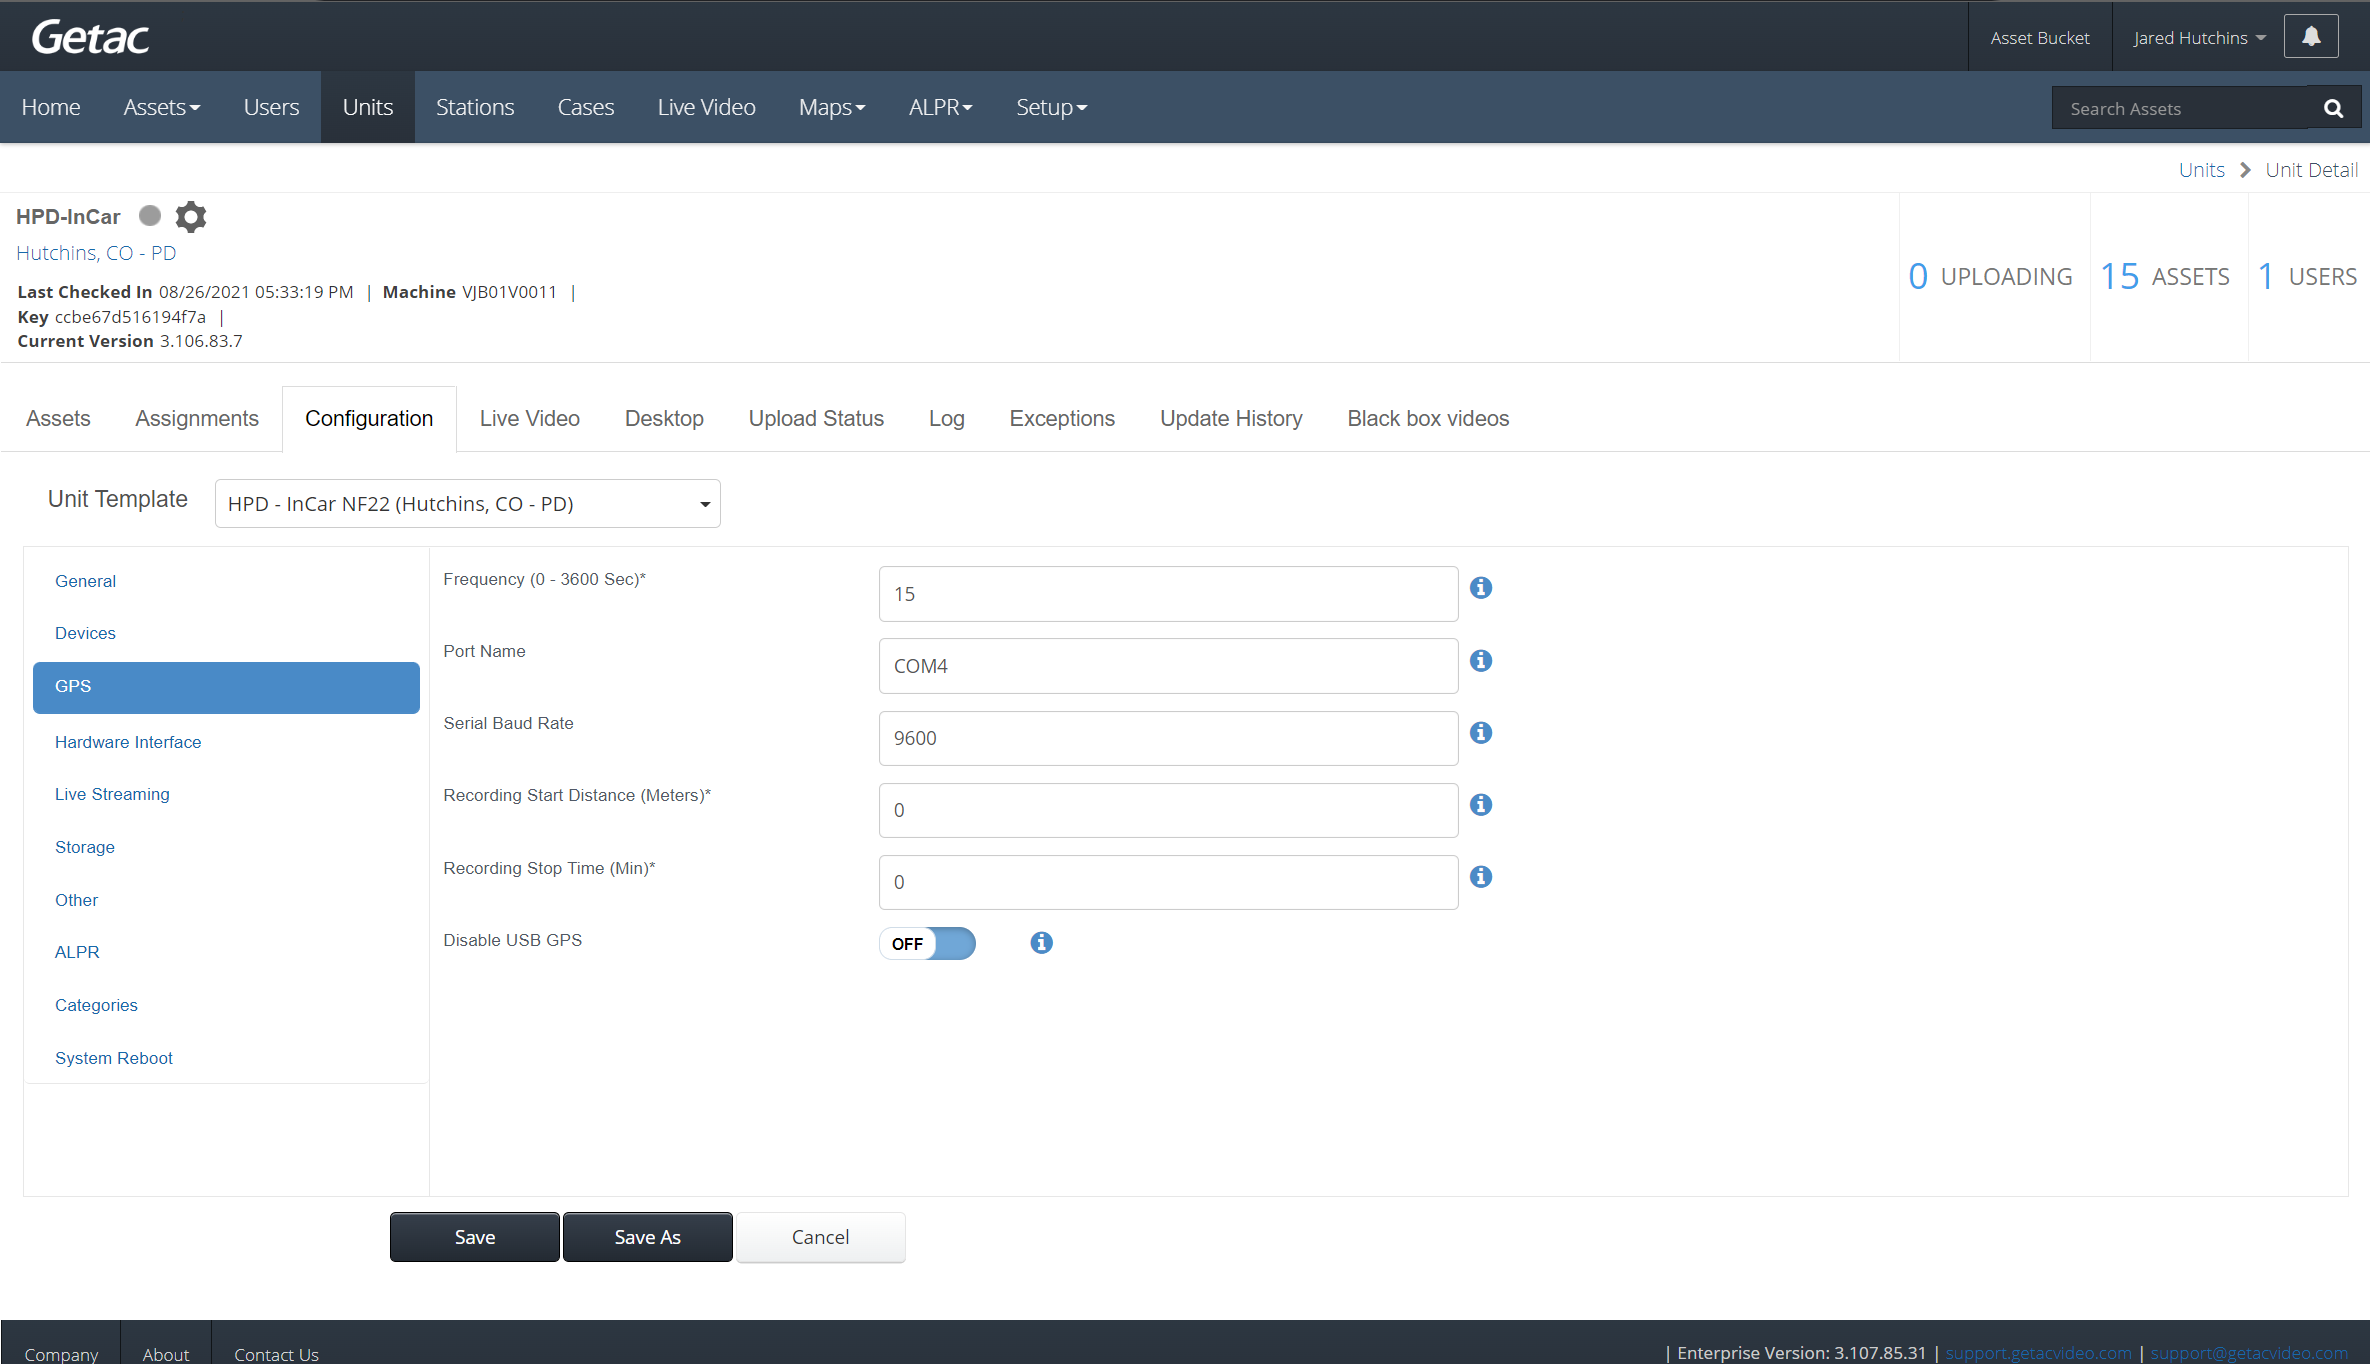
GPS
This sub-page allows for the configuration of GPS data to receive, record, and display location metadata in Online w/GETAC.
Settings that can be configured are as follows:
- Frequency - The interval in seconds the GPS coordinates will be recorded/updated.
- Port Name - The COM or UDP port that GPS data is expected to be sent to the InCar application from.
- Serial Baud Rate - The speed at which the data is transferred from the GPS receiver to the DVR.
- Recording Start Distance - Automatically starts recording after the vehicle has driven the specified number of meters.
- Recording Stop Time - Automatically stops recording after the vehicle has driven the specified number of meters.
- Disable USB GPS - Disables the ability to receive GPS input over USB.
See image below for an example:
Hardware Interface
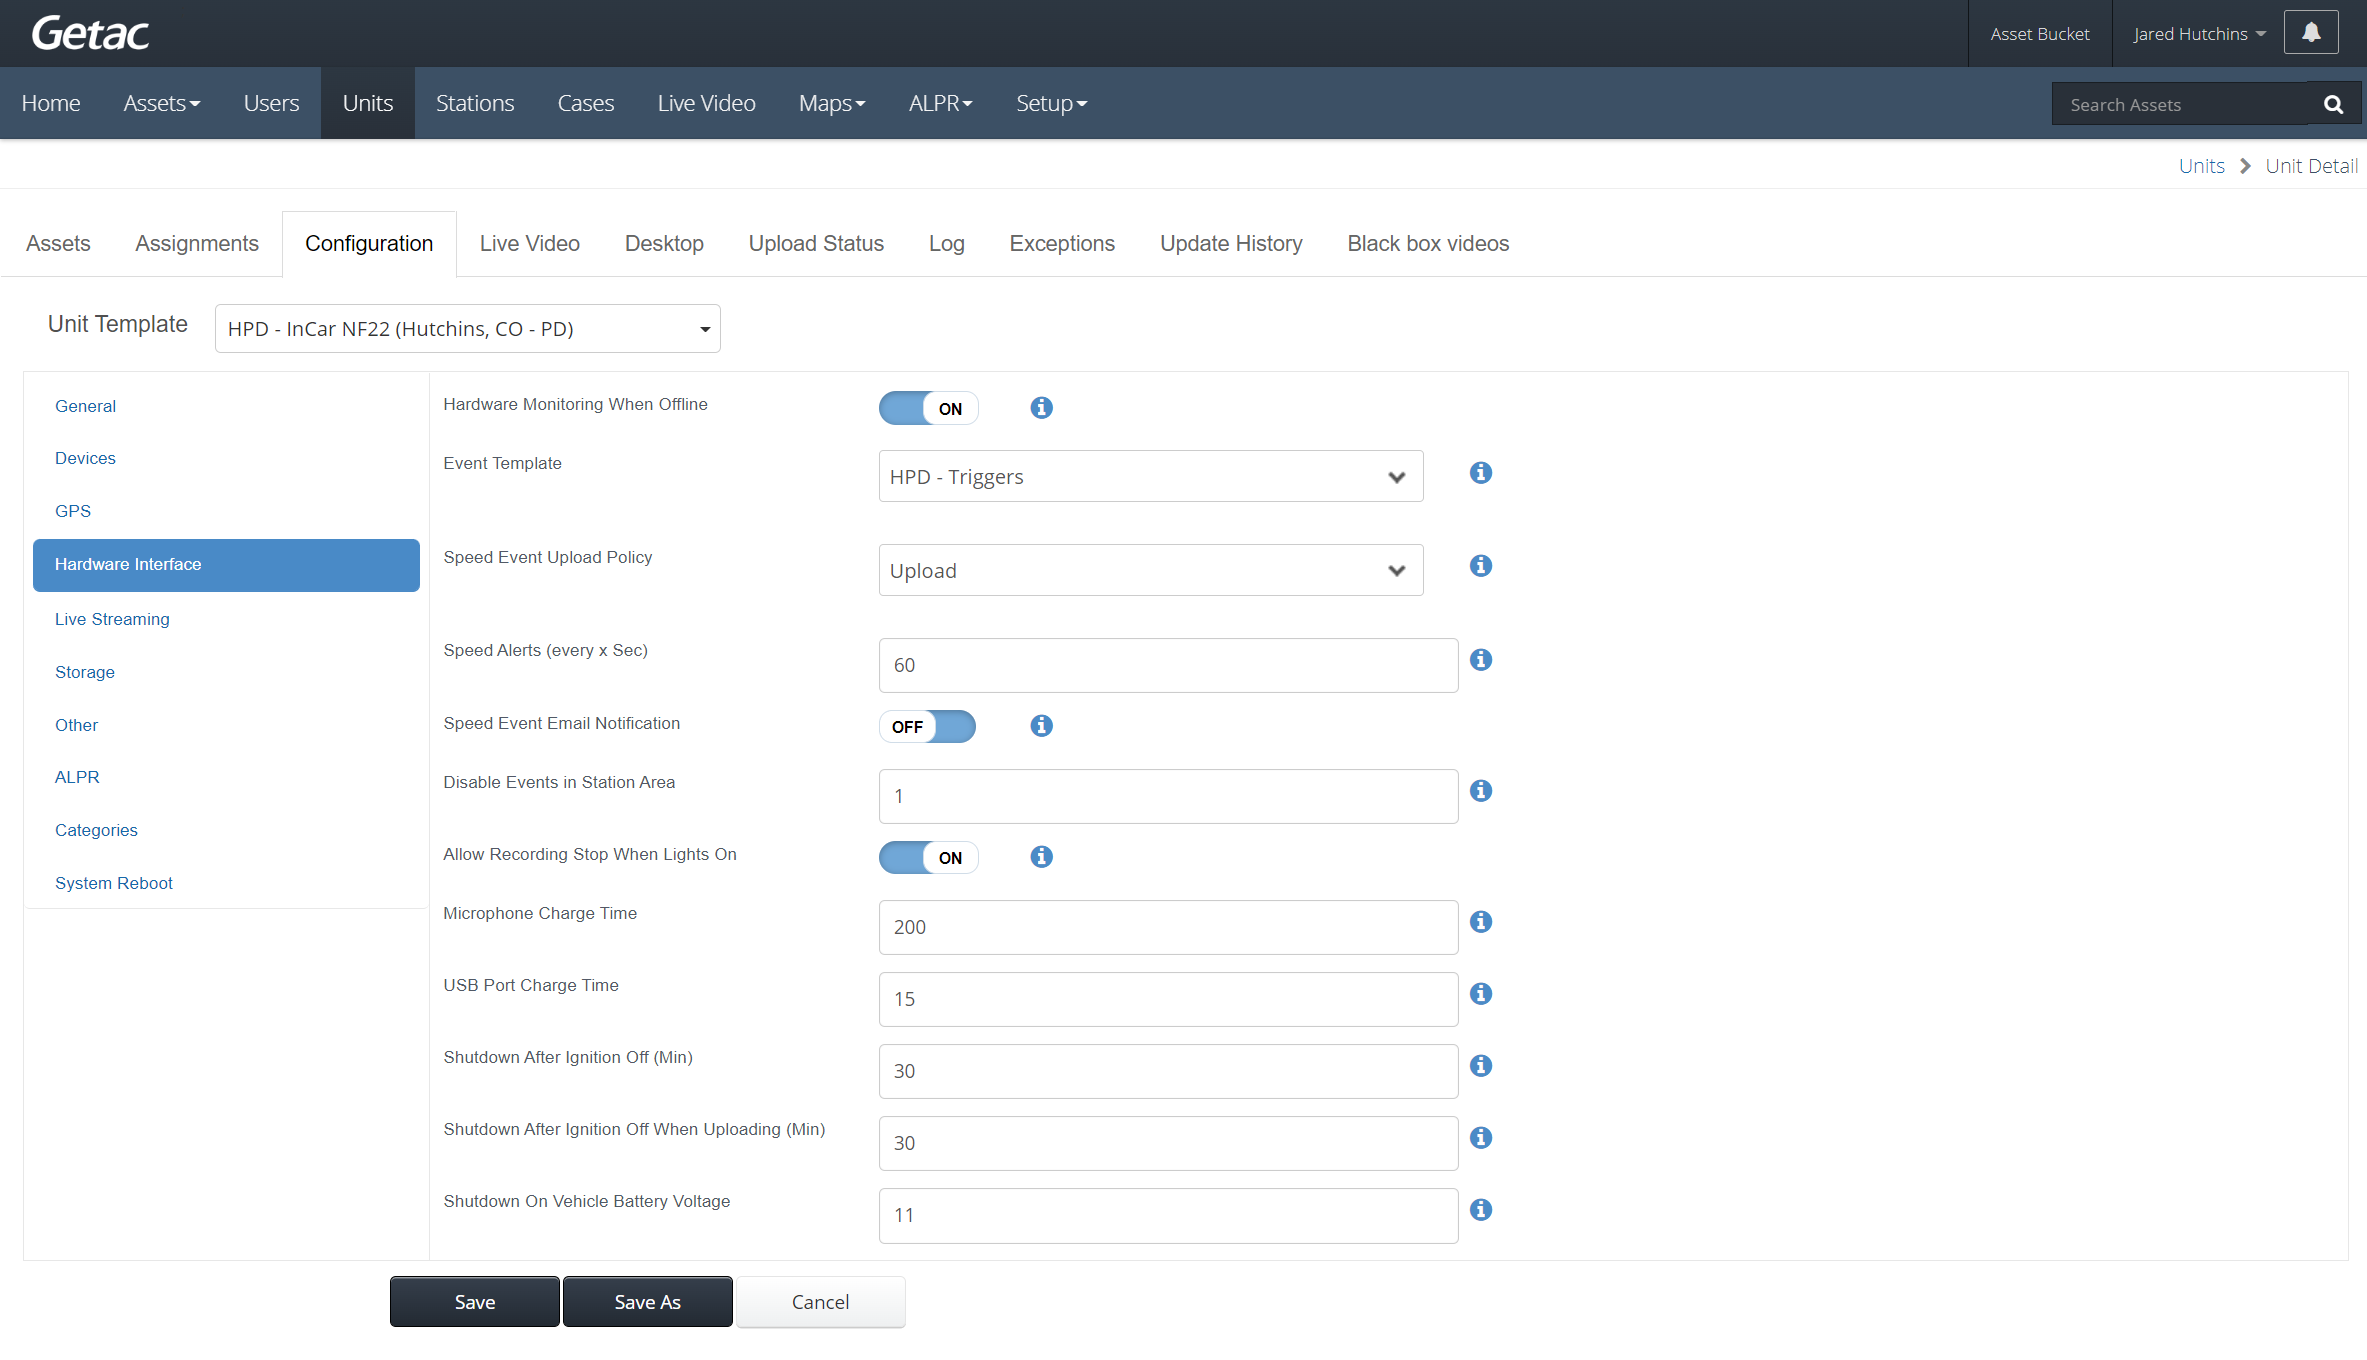
This sub-page is used to set the primary configuration for DVR devices.
Settings are as follows:
- Hardware Monitoring When Offline - If enabled, the assigned template sensors and events will be enabled and active.
Warning:This setting must be enabled to ensure activation of all GPIO Sensors & Events.
- Event Template - Select the sensor event template that will be used for this unit template.
- Speed Event Upload Policy - Specify which upload policy will apply to recordings generated from speed events.
Warning:
- This setting MUST have an Upload Policy that allows for uploading, e.g. Upload or Upload - Normal.
- Failure to select an Upload Policy may result in data loss due of video assets recorded where the speed activation trigger is active and subsequently, not uploading to the server and being deleted by local Retention policy.
- Getac is NOT responsible for data loss due to improper setup of configuration templates.
- See this article for more information on creating and managing Upload Policies or contact [email protected] for assistance.
- Speed Alerts - How often (in seconds) email alerts about a speeding event will be sent for speed trigger setting.
- Speed Notification - Email Notification for speed trigger setting. The email address for this setting is at the Station level.
- Disable Events in Station Area - The distance in kilometers near the Station where recording events will not engage.
- Allow Recording Stop When Lights On - Allows Users to stop the recording even when the light bar is engaged.
- Microphone Charge Time - The maximum time in minutes the Wireless Microphone can draw power from the DVR.
- USB Port Charge Time - The maximum time in minutes the connected USB devices can draw power from the DVR.
- Shutdown After Ignition Off - The number of minutes after the engine shuts down that the DVR will automatically power down.
- Shutdown After Ignition Off When Uploading - The number of minutes after the engine shuts down that the DVR will automatically power down while actively uploading Assets.
- Shutdown on Vehicle Battery Voltage - If the vehicle battery voltage falls below this value, the dDVR will automatically power down.
See image below for an example:
Live Streaming
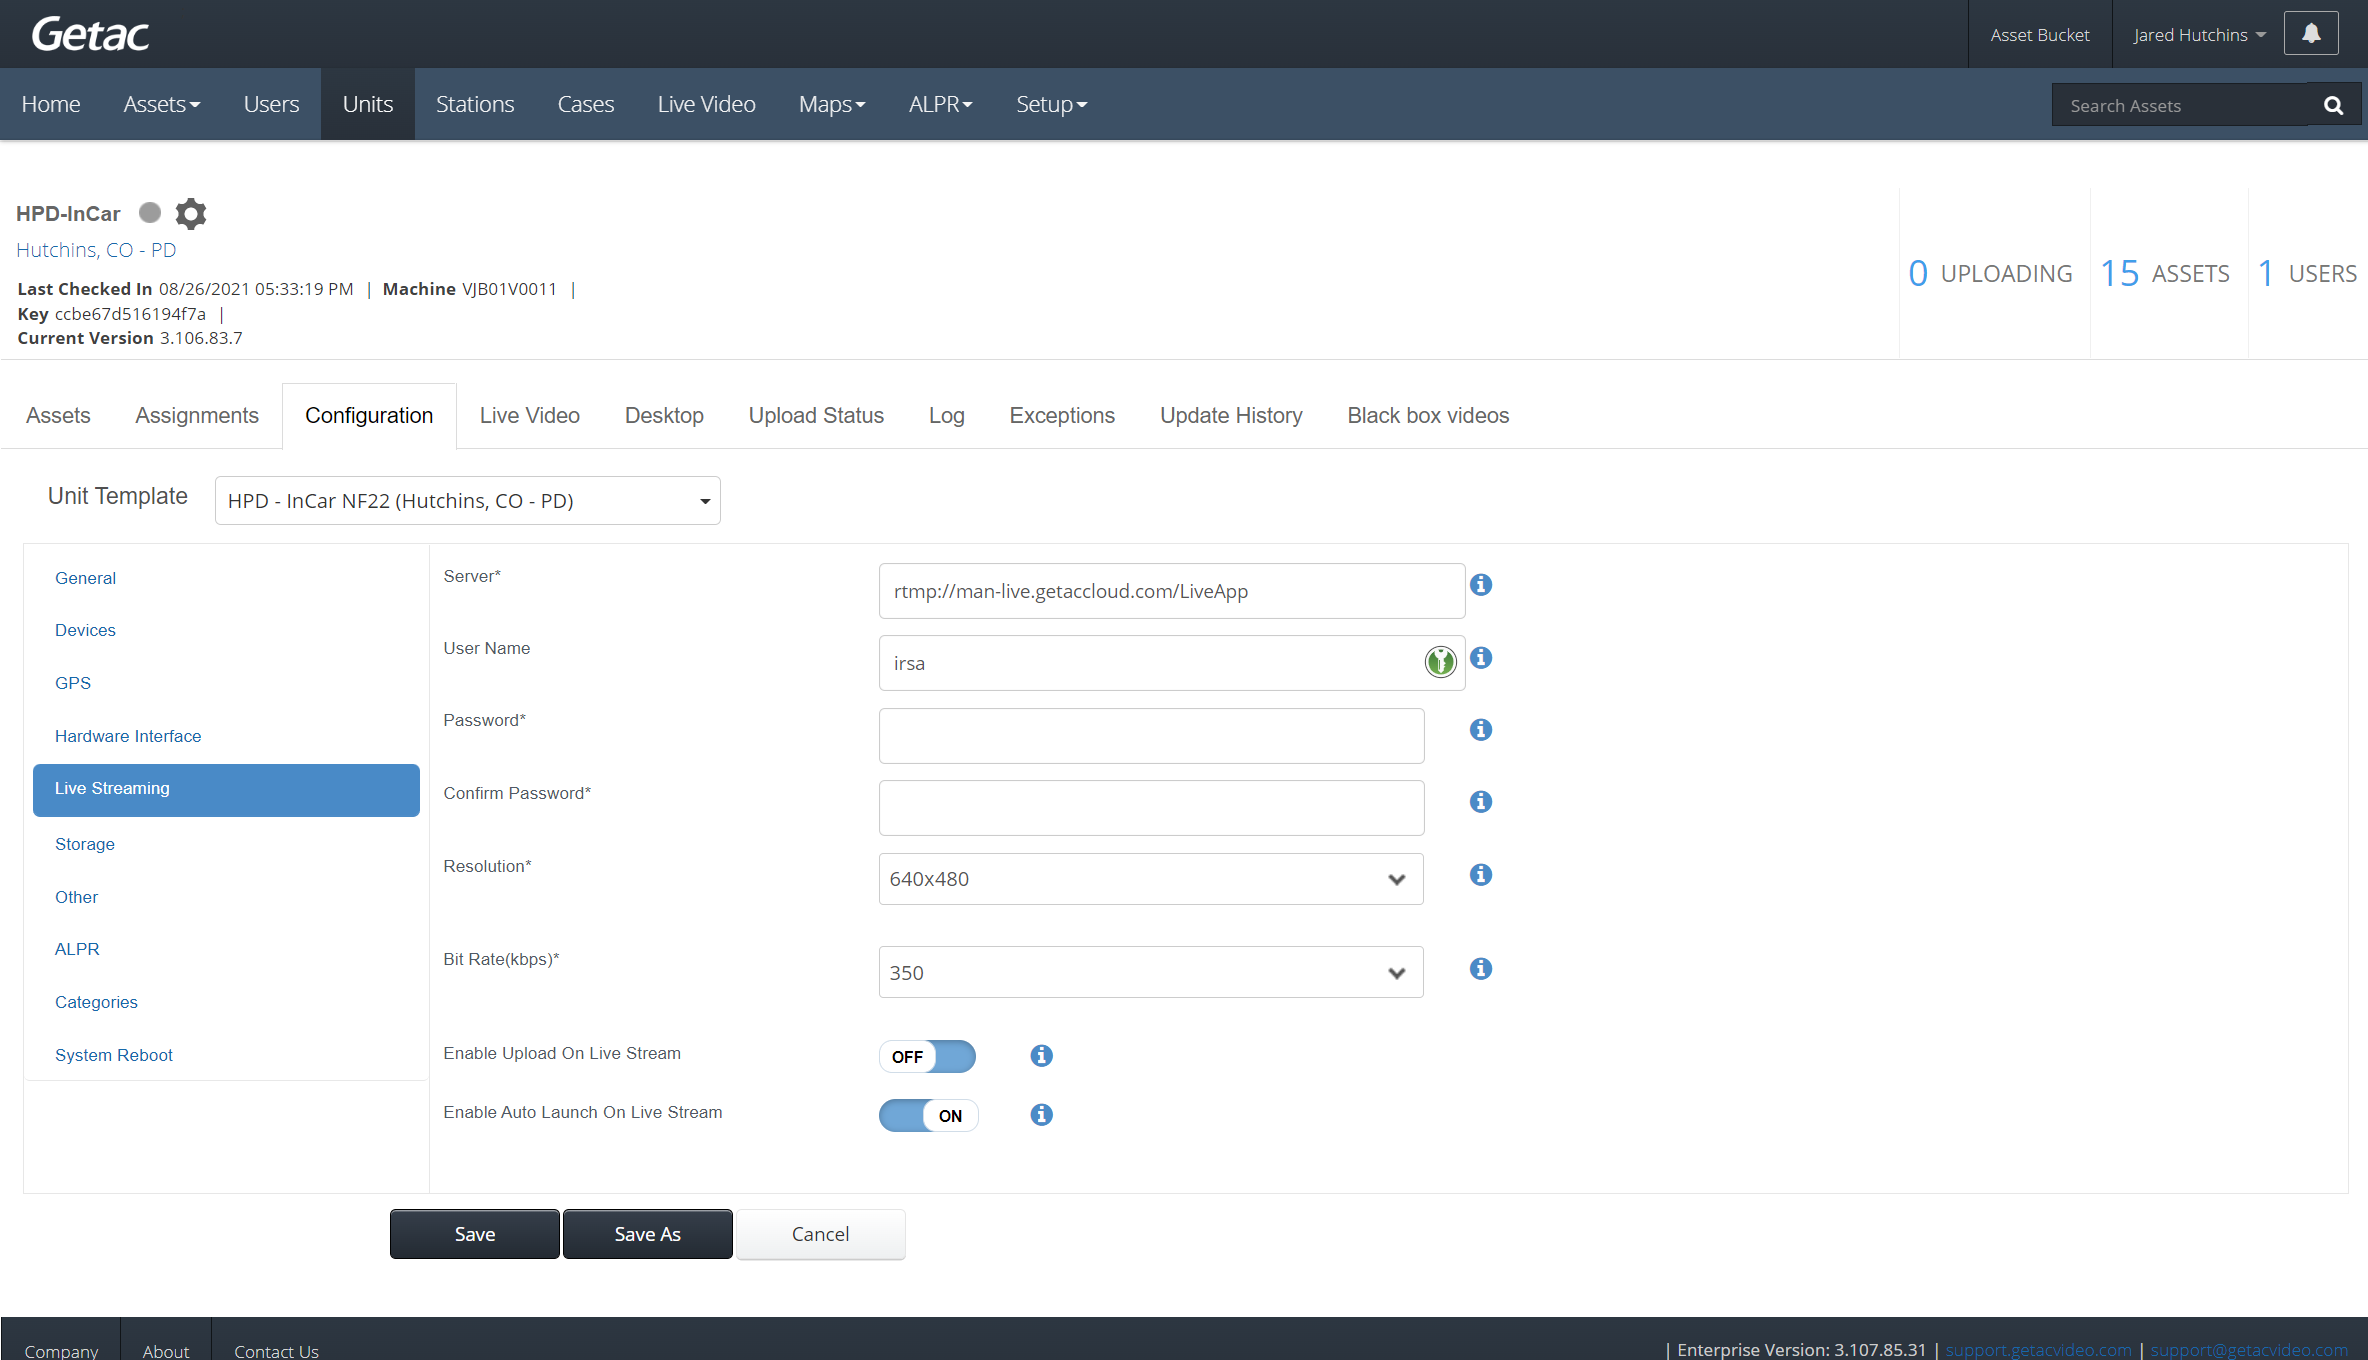
This sub-page is for configuring how livestreaming is accessed, viewed, and streamed from the device.
Settings are as follows:
- Server Link - The URL path to connect to livestreaming.
- User Name - User Account ID used to access the camera livestream.
- Password - Password used to access the camera livestream.
- Confirm Password - Retype the live stream account password exactly to confirm accuracy.
- Resolution - Set to either 320x240 or 640x480 streaming resolution.
- Bit Rate - Can be set between 200 and 1000 kbps.
- Enable Upload on Live Stream* - Allows Asset upload to continue during the live stream.
- Enable Auto Launch on Live Stream - Automatically opens the InCar application on livestream request. Only functions if configured for Car Mode.
See image below for an example:
Storage
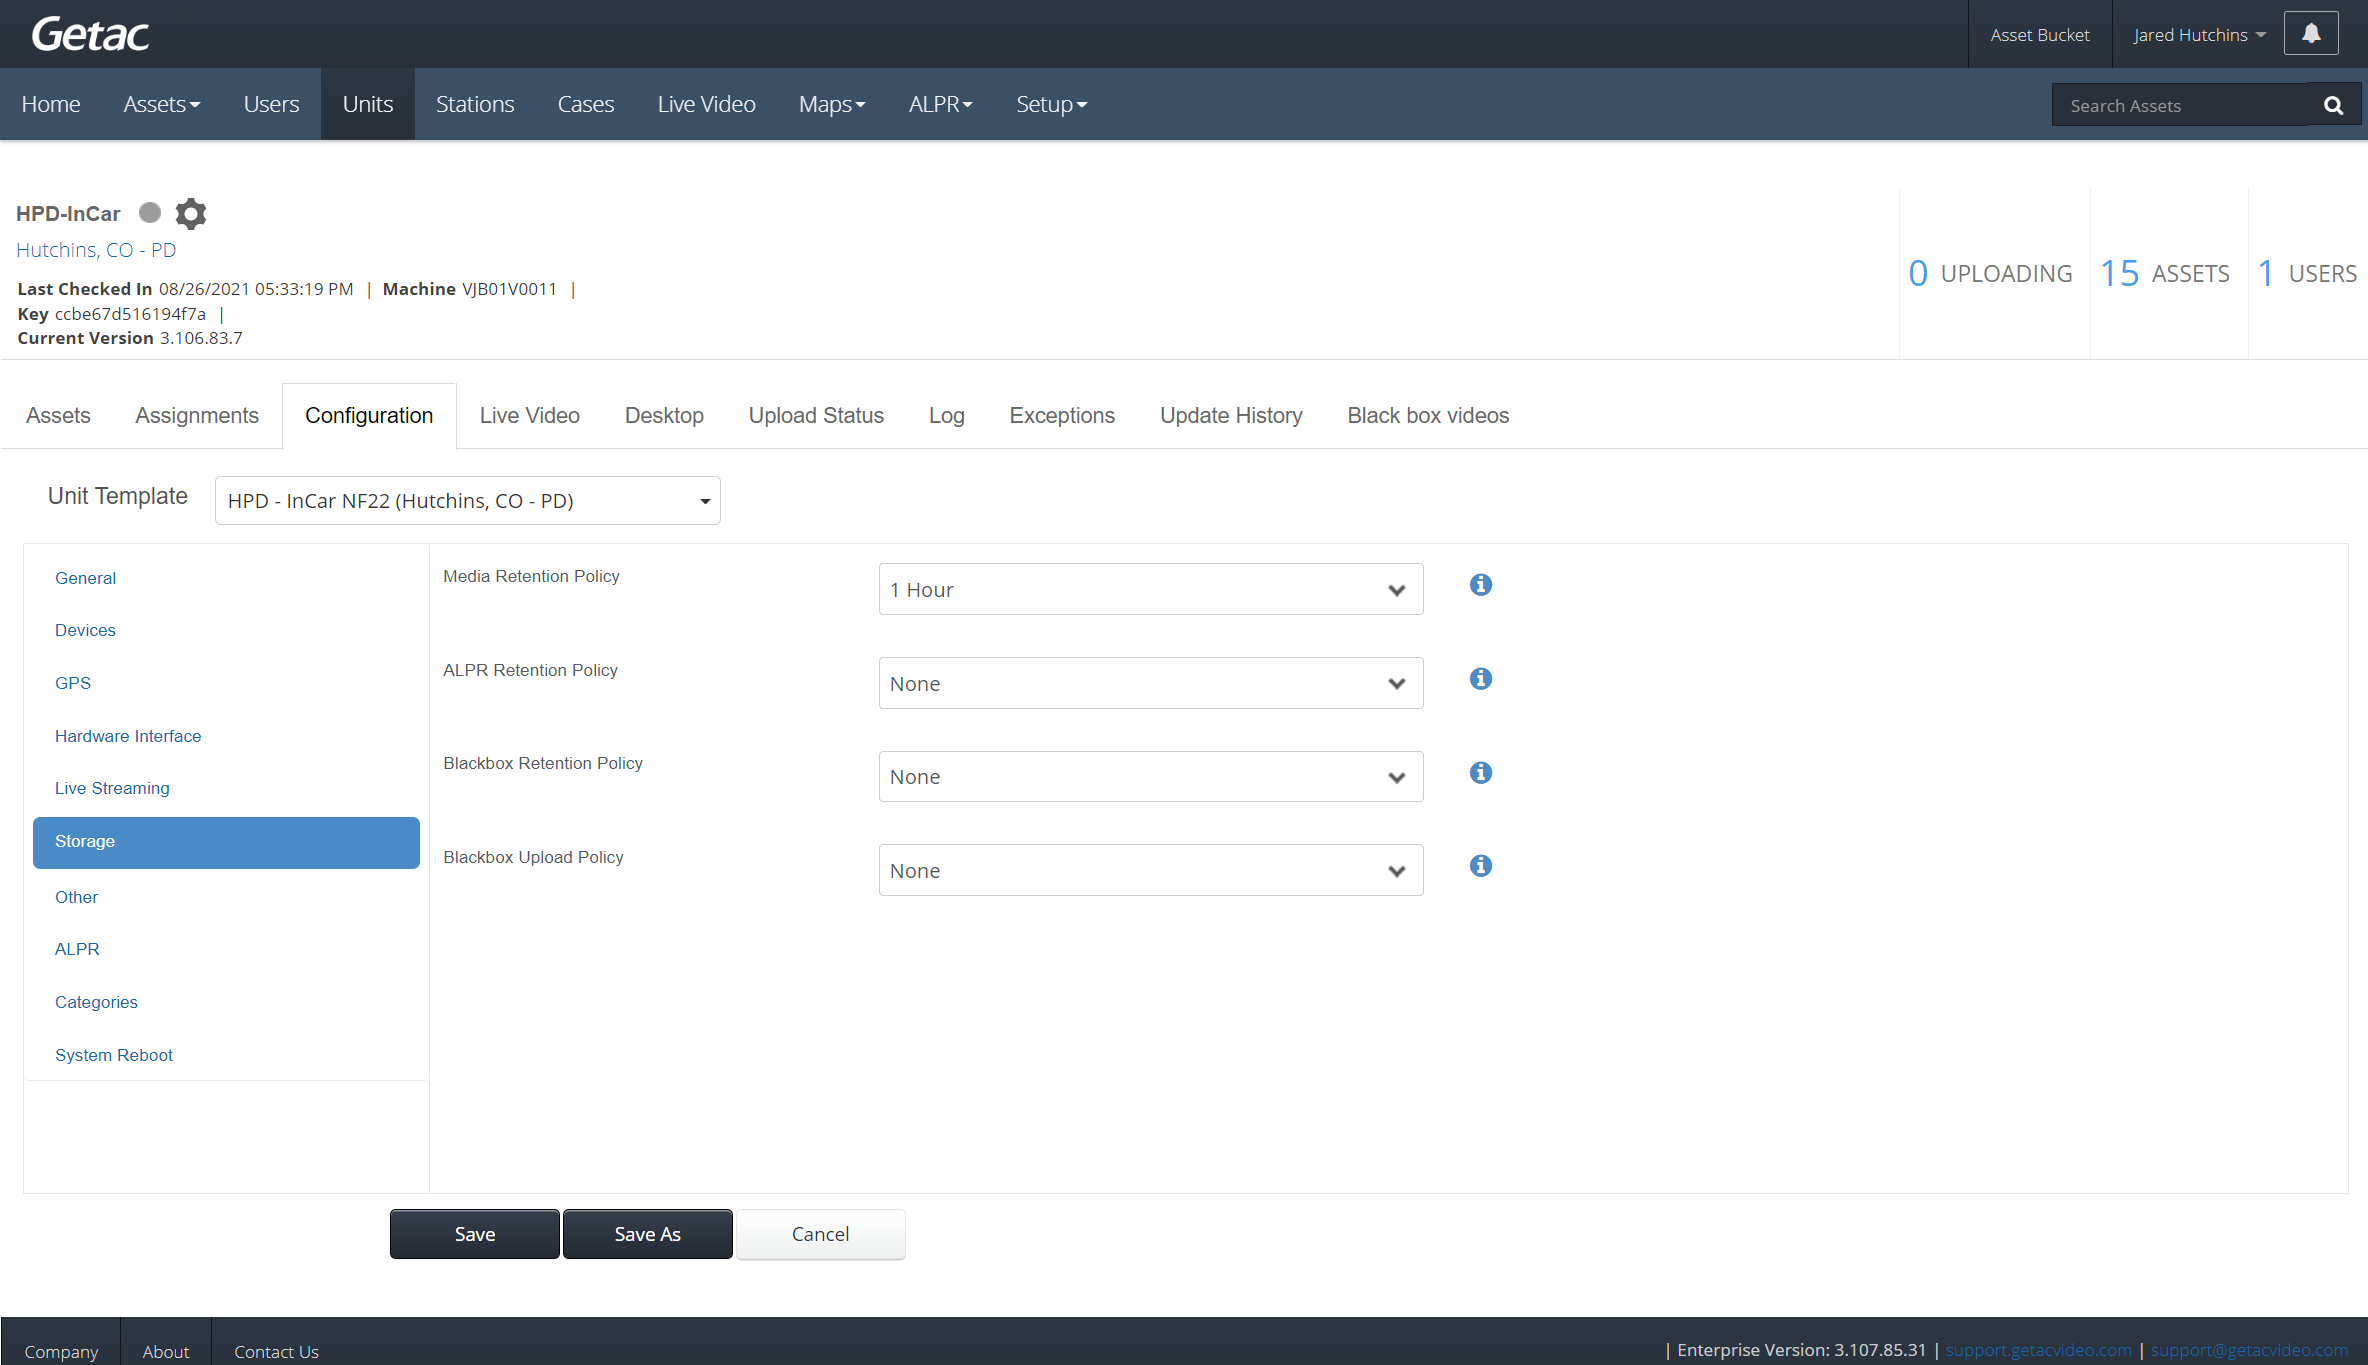
This sub-page is used to set which asset storage Retention policies are applied to DVR Devices.
Settings are as follows:
- Media Retention - Assign an Asset Retention policy.
- Black Box Retention - Assign BlackBox Recording Retention policy.
- Black Box Upload - Assign BlackBox Recording Upload policy.
See image below for an example:
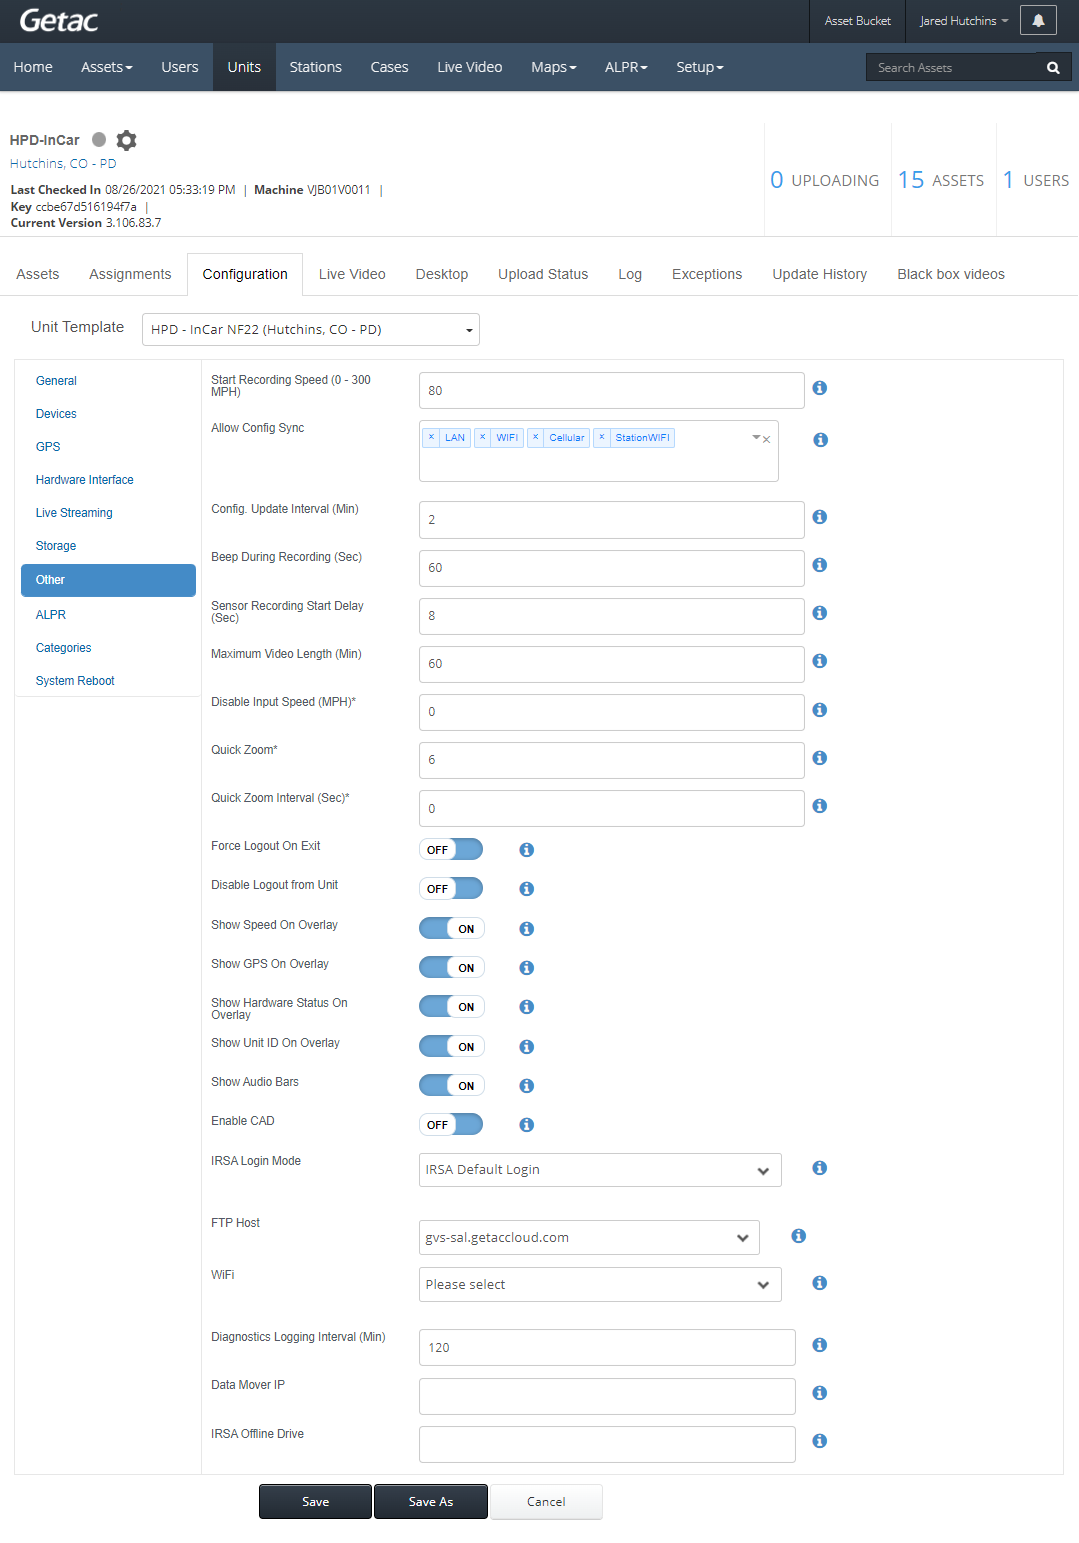
Other
This sub-page contains miscellaneous InCar configuration options.
Settings are as follows:
- Start Recording Speed - Indicates the speed at which speed alerts and speed notifications will be generated.
- Allow Config Sync - Specify which upload connections (policies) the unit configuration can be updated on.
- Config Update Interval - Set how often (in minutes) the device will check and synchronize unit configuration updates.
- Beep During Recording - Designed to help remind Users that an active recording is in progress. Specify the interval (in seconds) between an audible beep when a recording is in progress.
- Sensor Recording Start Delay - Specifies the time the end-user has to cancel a recording after activating a sensor(trigger), e.g. light bar activation. The system continues recording as normal if the sensor is not deactivated within the specified time.
- Maximum Video Length - Sets the recording length (in minutes) of all media files before they are divided into new file Segments.
- Disable Input Speed - Disables the use of controls on the CU-D50 display panel and InCar application controls when a specific speed is reached.
- Quick Zoom - Designed for use with an Optical Zoom Camera, sets the optical zoom level for the quick zoom function in standard zoom-x magnifications, e.g. 10 is the maximum value for a 10x optical zoom camera.
- Quick Zoom Interval - Designed for use with an Optical Zoom Camera, sets the timeframe (in seconds) that the camera will say zoomed in before zooming out when using the quick zoom function.
- Force Logout on Exit - When closing the InCar Application, all logged-in Users will be logged out.
- Disable Logout from Unit - Disables the User's logout function on the InCar Application.
- Show Speed on Overlay - Show Speed on Overlay.
- Show GPS on Overlay - Toggles the visible GPS overlay on the preview and recording screens in the InCar application.
- Show Hardware Status on Overlay - Toggles the visible Event trigger label overlay(s) on the preview and recording screens in the InCar application.
- Show Unit on Overlay - Toggles the visible Unit ID overlay on the preview and recording screens in the InCar application.
- Show Audio Bars - Toggles the visible Audio source gain bars on the preview and recording screens in the InCar application.
- IRSA Login Mode - Indicates the method users use to log in to the InCarapplication such as:
- CAD-based login - When logging into the CAD system, an XML file is saved to the hard-drive and used to automatically sign into the InCar application.
- IRSA Default Login: Default login method for Users not using any other login method, e.g. AD.
- Windows-based Login: Uses the authenticated Windows User Account to automatically log-in to the InCar application.
- AD-based Login: This allows the user to login to Getac with their AD credentials. Requires AD sync setup on the Enterprise.
- FTP Host - Set which FTP server will be used to synchronize assets on the device to Getac Enterprise.
- WiFi - Specify which Wi-Fi connection the BC-02 can use to synchronize data to the DVR.
- Diagnostics Logging Interval - Specify the interval (in minutes) that information will be added to the diagnostic logs.
- Data Mover IP* - Centralized Data Mover.
- IRSA Offline Drive - Used for the USB offload. Allows you to specify the drive letter and if a USB drive is inserted to the specified drive, assets will be offloaded to the USB drive if no active connection is detected.
See image below for an example:
Categories
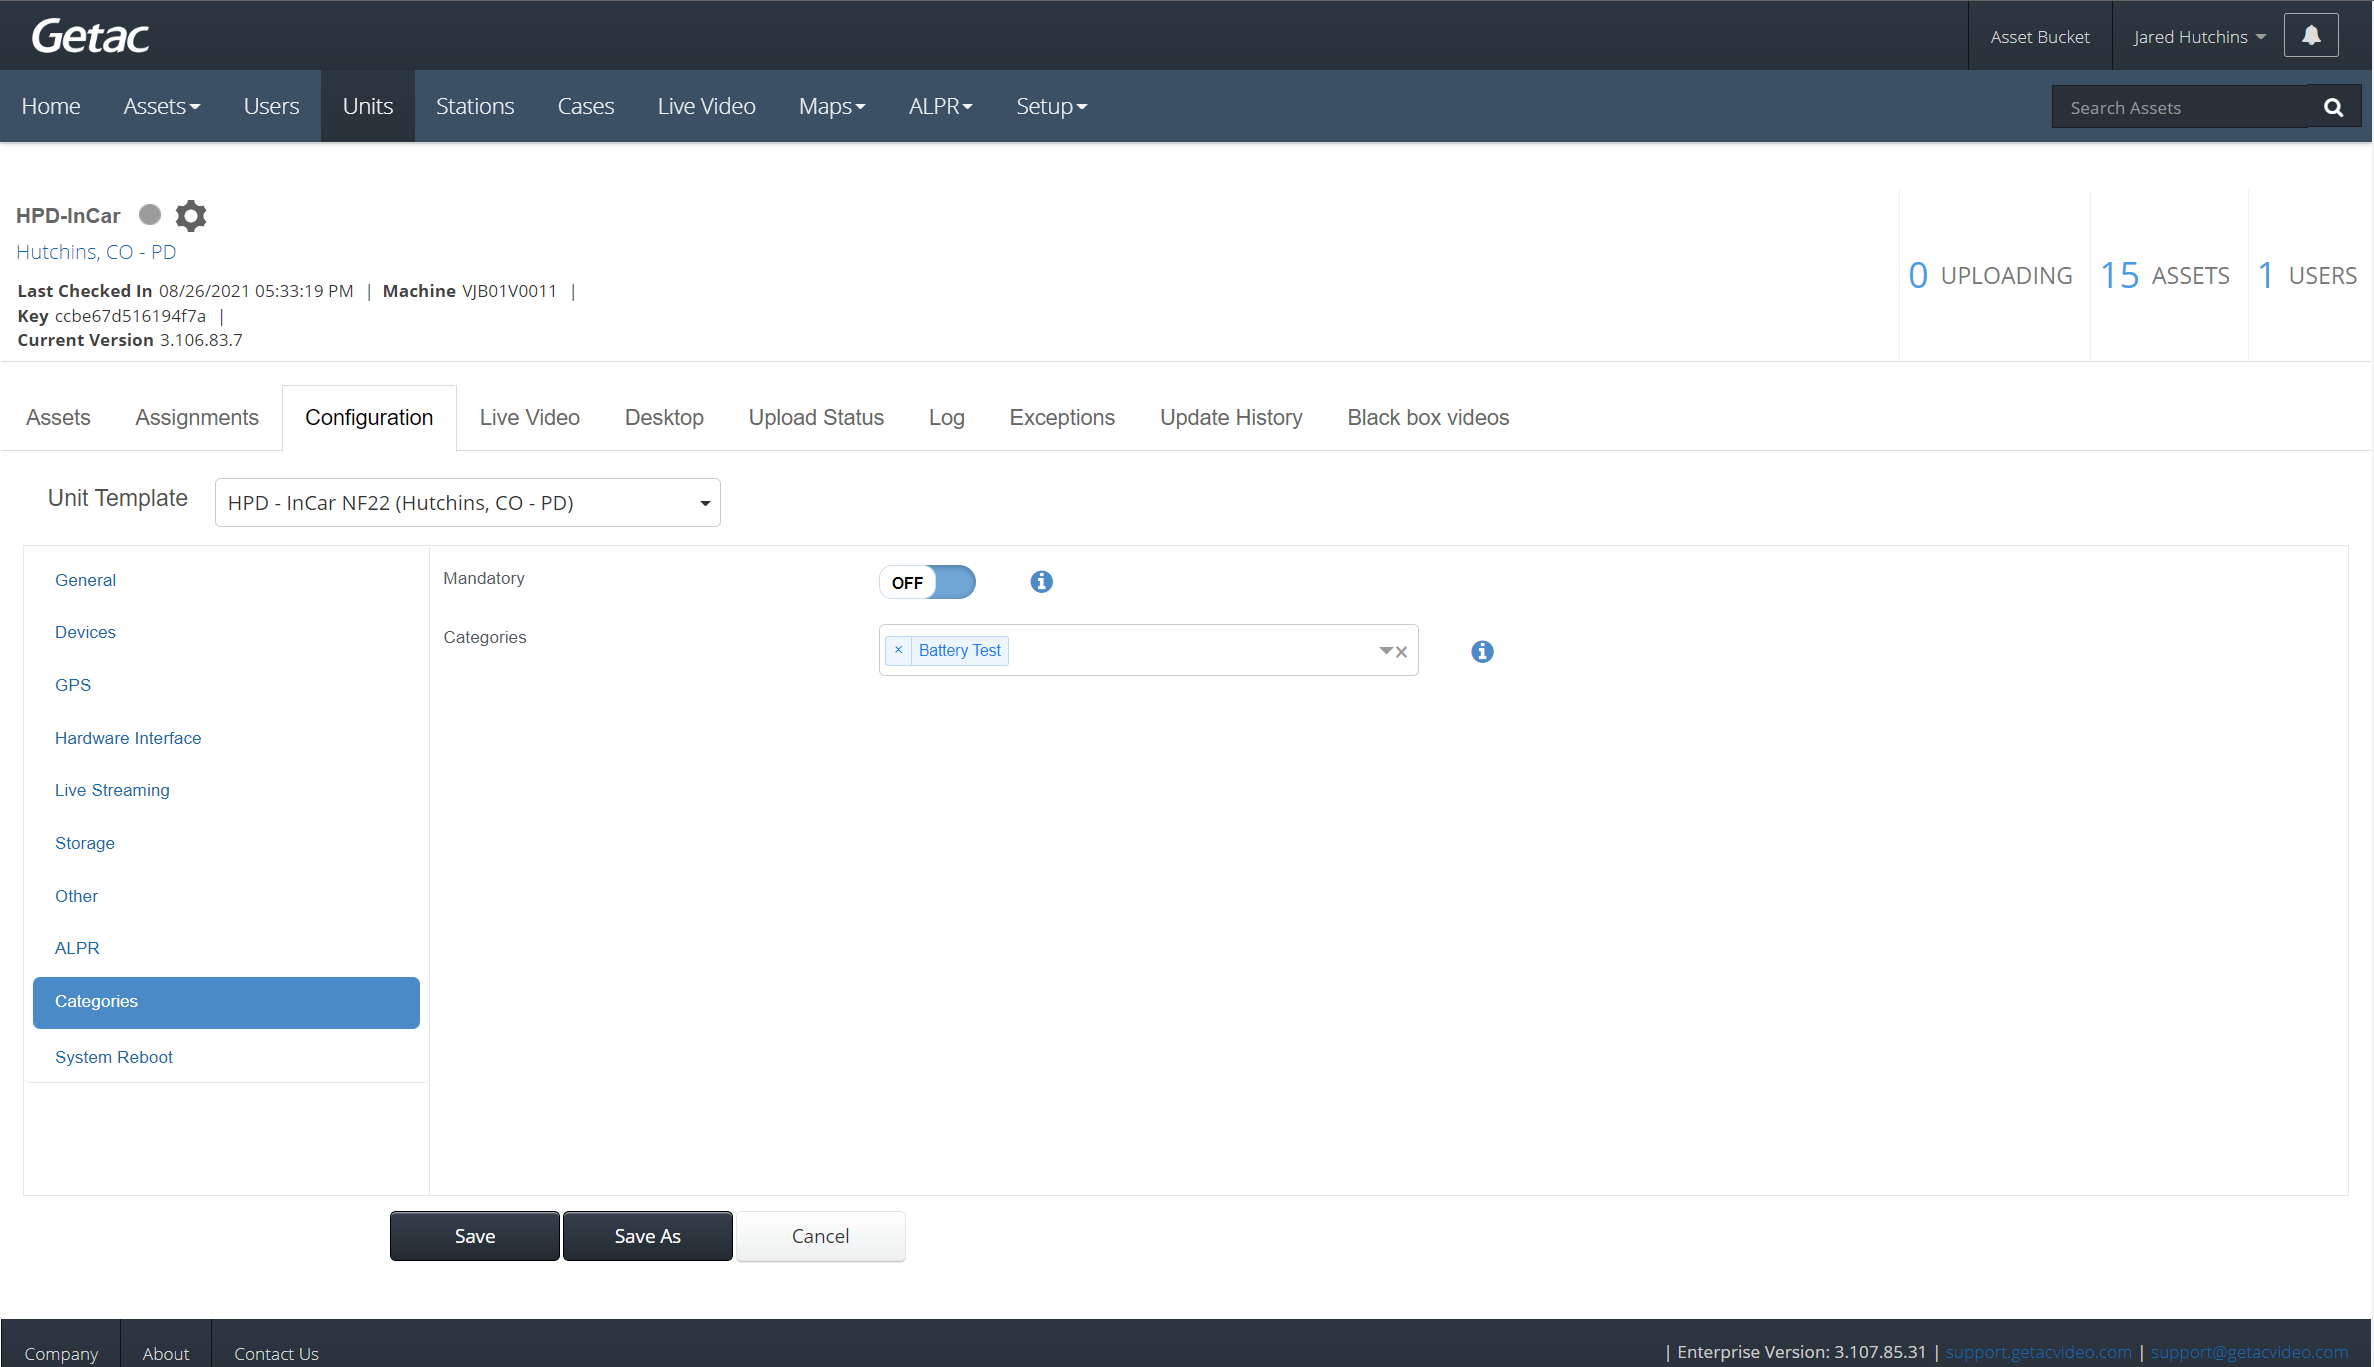
This sub-page allows you to set whether Asset applying a Category is mandatory and which categories will be available to Users to assign to recorded Assets from the device.
Settings are as follows:
- Mandatory - On or Off
- Categories - Choose which categories should appear to the end-user on the CU-D50 or other display once a recording has been stopped.
See the image below for an example:
System Reboot
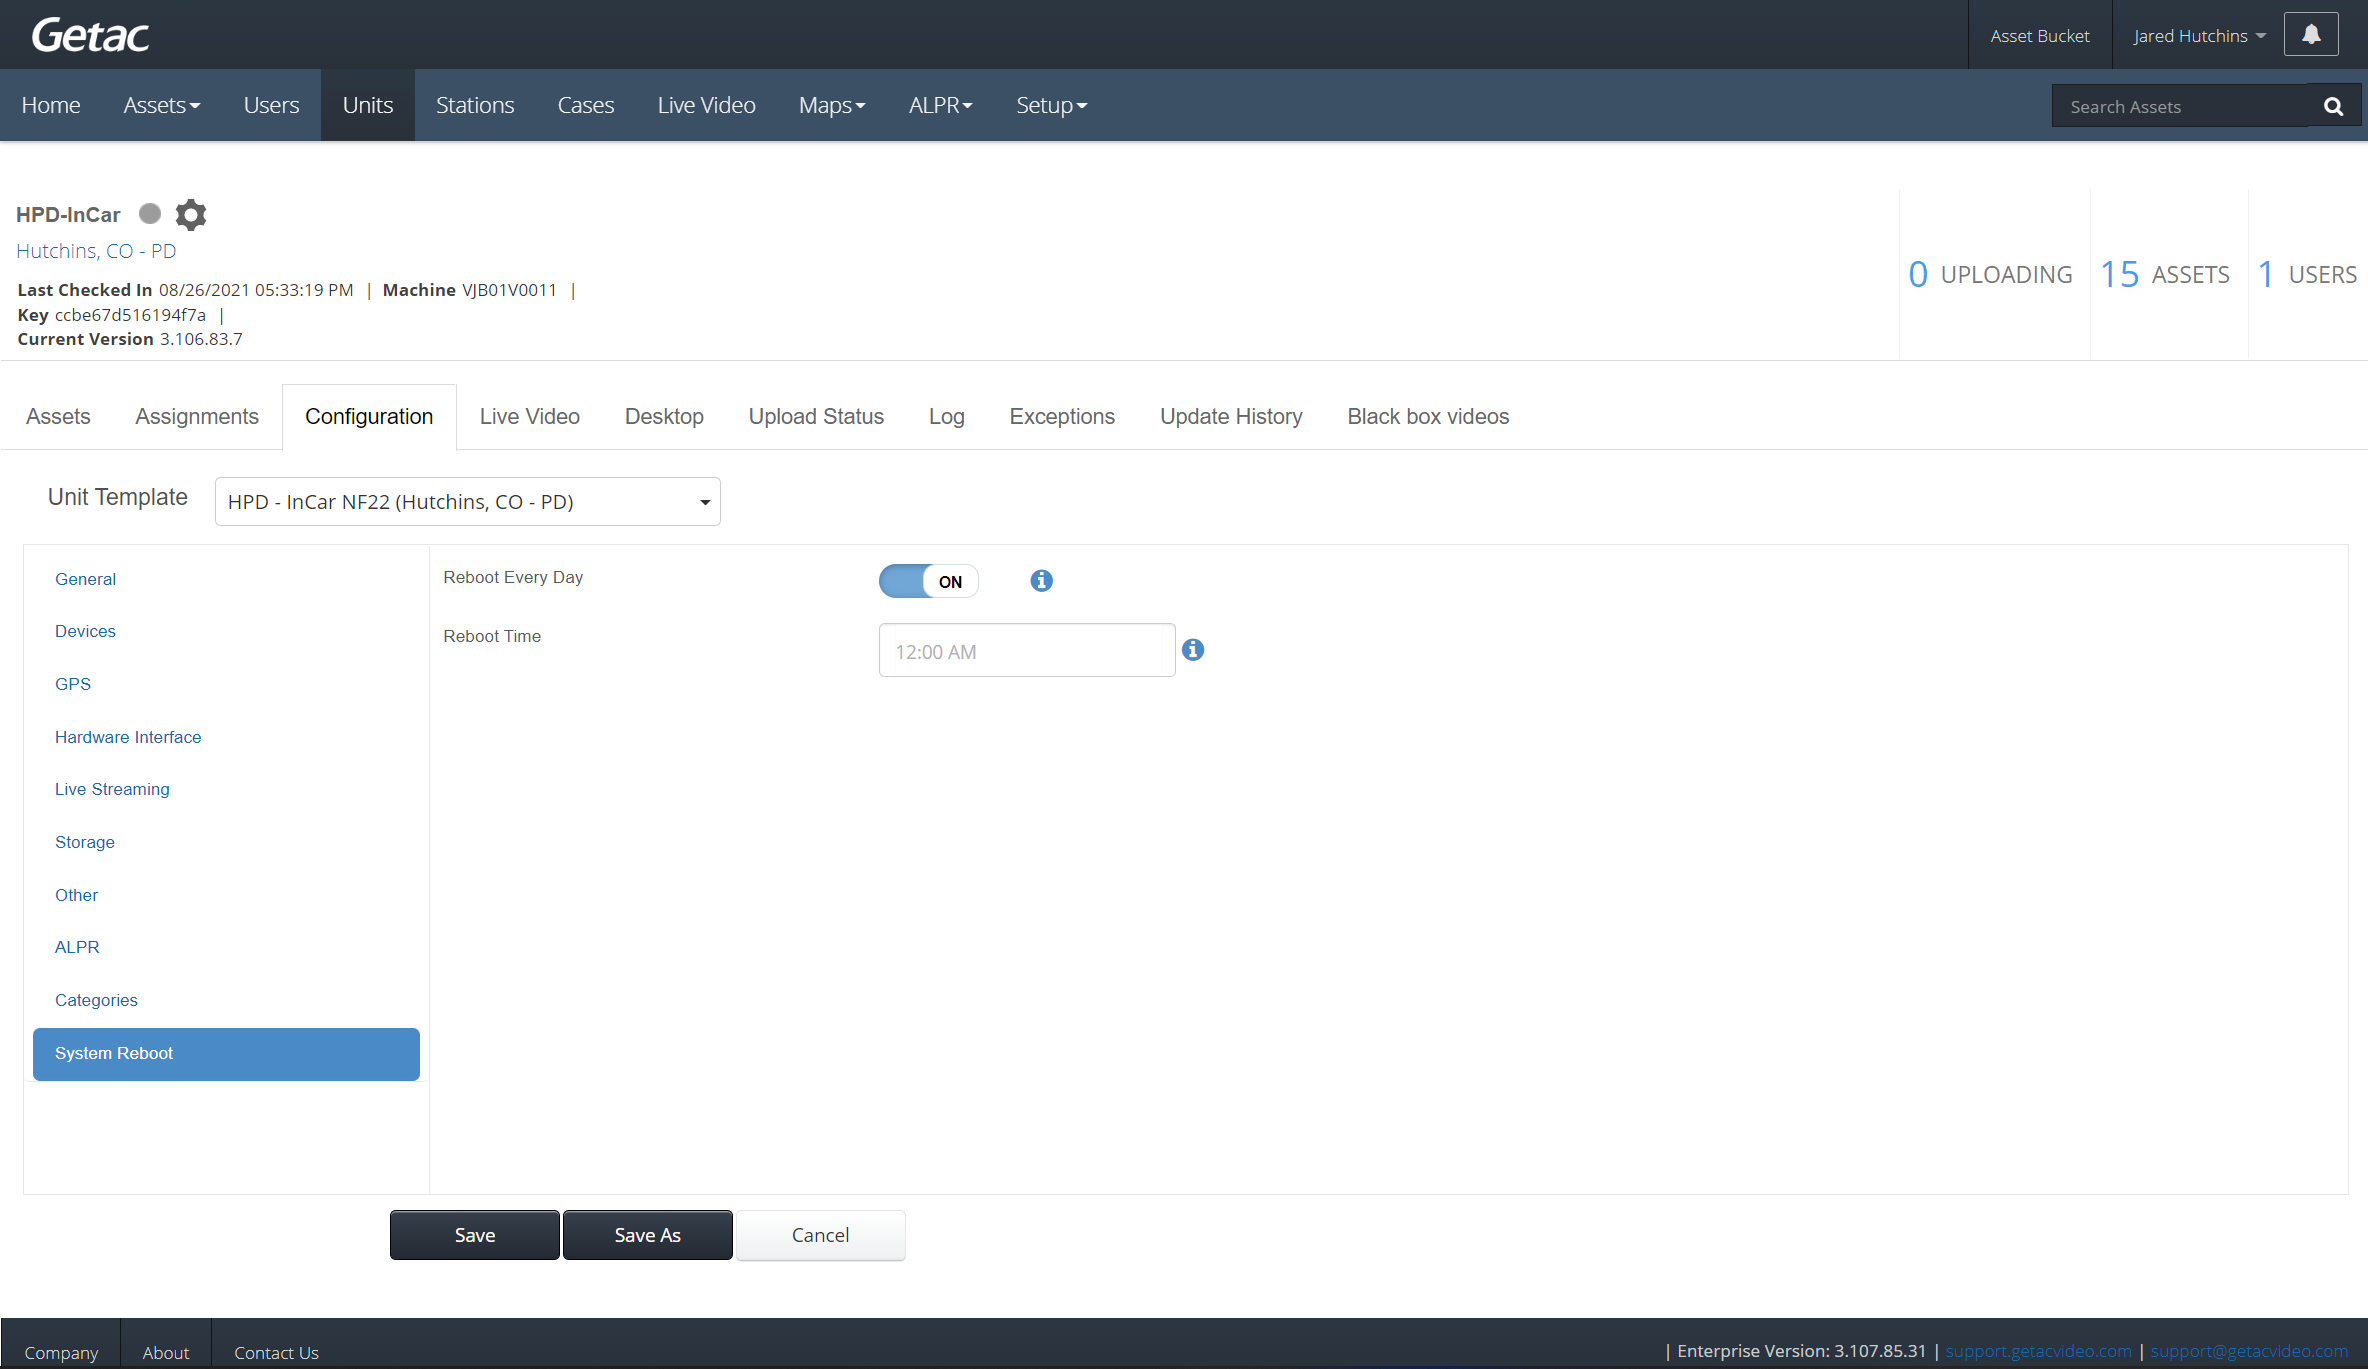
This sub-page allows you to enable or disable a daily DVR reboot.
Settings are as follows:
- Reboot Every Day - On or Off
- Reboot Time - Set which hour of the day the device will reboot.
See the image below for an example:
Save/Save As
Once the desired configuration parameters have been set, two options are available to save the settings:
- Save -
- If Custom Config is selected from the Unit Template drop down list, saved settings will apply to only the selected Unit.
- If a Unit Configuration Template is selected from the Unit Template dropdown list, saved settings will apply to all Units with that configuration.
- Save As - Use this feature to create a new template from the selected settings and apply to the selected Unit. This helps avoid accidentally changing the configuration of all Units with an assigned template. This is also helpful when testing one or two changes on an existing template with one Unit.
See the image below for an example:


