1647
1647
Warning:
This feature is deprecated and will no longer function as this article covers. Use Advanced Redaction covered here.
Overview
The Redaction suite is designed to change an existing Asset before releasing it to the public or media.
Note:
Original Assets are never modified during the Redaction process. A copy is made, which is then used to add Redaction tools. Once processed, the redacted file becomes a child Asset with its own Checksum and audit trail.
The redaction tools include:
- Clip: Create a clip from any point in the video, e.g., shorten
- Segment: Choose multiple segments from a video and splice them together
- Blur: An area of the video can be blurred by adding a box at that point in the video
- Audio: Audio can be removed from segments of a video by mute or a beep overlay
- Microsoft Facial Redaction: Blurs all faces found in the video
- Analyze: Analyzes the video for any faces, then allows the user to choose which faces to blur
Navigation
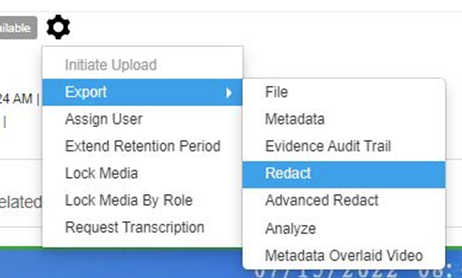
To access the Redaction tool from the Detailed Asset Page, click on the Gear icon > Export > Redact.
See the image below:
The Redaction panel will appear to the right of the Asset viewer. See the image below for an example:
Note:
For an Asset Group, the User will first be prompted to choose which camera view to redact, and the page will reload with that Asset. Click the Gear icon > Export > Redact again, to open the Redaction page.
To begin, first one or more tools must be added. Follow these steps:
- Click on the timeline button to add a toolbar menu. Repeat this process to add additional tools.
- Select a tool from the dropdown bar to display a timeline.

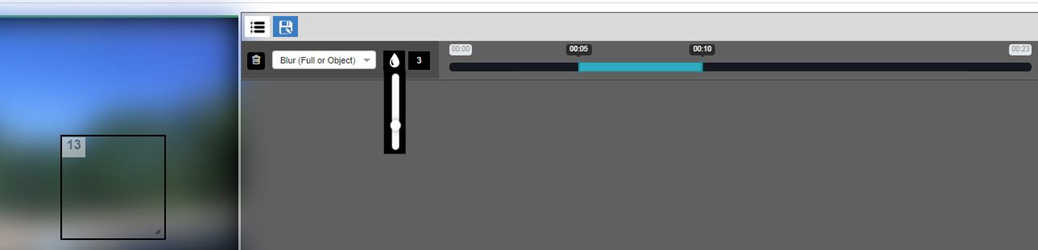
Ex. Redaction Timeline
Note:
Click on the trash can icon to the left of the tool dropdown bar to remove it from the timeline.
Clip tool
This tool allows a user to create a clip from any point in the video, e.g. shorten.
To create a clip:
- Choose the Clip tool from the dropdown bar.
- Drag the ends of the blue timeline bar to the desired start and stop times.
- Click the save button if finished, or add additional tools if desired.

Segment tool
This tool allows the user to choose multiple parts of a video and splice them together into a shorter video file.
To create a segment:
- Choose the Segment tool from the dropdown.
- Using the blue timeline on the right, drag the slider to the desired start and stop times of the first segment.
- Add a timeline and choose a second Segment tool from the dropdown.
- Again, drag the slider to the desired start and stop times of the second segment.
- Continue this process for each segment from the video.
- Once all segments are chosen, add a final timeline and choose the Join Segments tool from the dropdown, which will splice all segments together into one video.
- Click the save button if finished, or add additional tools if desired.

Blur Tool
This tool allows the User to add a box to an area of a video to obscure the object(s) behind the box. The box can be resized and the transparency of the blurring can be adjusted. Multiple blur timelines can be added to obscure multiple objects or to obscure one object that moves during the video. The entire video frame can be obscured by sizing the box to cover the full size of the video.
To blur an area:
- Choose the Blur tool from the dropdown.
- Using the blue timeline on the right, drag the slider to the desired start and stop times when the blurring is required.
- A box will appear on the video player. The box can be resized by clicking and dragging the right side, bottom, or bottom-right corner to make the box the desired size to obscure the object.
- The box can then be dragged over the object and resized again if needed.
- The transparency of the blurring can be adjusted by clicking the blur icon on the toolbar and selecting 1-10.
- Add additional Blur timelines for multiple objects or tracking one object.
- Click the save button if finished, or add additional tools if desired.
Caution:
This tool does not actively track people or objects for redaction purposes. See Automatic Face Redaction below for this process.
Audio Tool
This tool allows the User to remove audio from a video file, either by muting or overlaying a tone.
To redact audio:
- Choose the Audio tool from the dropdown
- Using the blue timeline on the right, drag the slider to the desired start and stop times when the audio will be removed
- Click the audio icon on the timeline to adjust the volume of the overlay tone from 0-10. If 0 is selected, the audio will be muted
- Add additional timelines if multiple sections of audio need to be removed
- Click the save button if finished, or add additional tools if desired.
Microsoft Facial Redaction
This tool allows the User to automatically track and blur all faces found in the Asset.
To redact faces:
- Select Microsoft Facial Redaction from the menu.
- Click the save button if finished, or add additional tools if desired.
Note:
Use the Analyze tool to redact specific faces for redaction.
Analyze tool
This tool allows the user to choose which faces to blur prior to using the Microsoft Facial Redaction tool. To access the Analyze tool, from the Detailed Asset Page, click on the Gear icon > Export > Analyze.
The gray redaction panel will appear to the right of the asset viewer. To Analyze faces:
- Click the menu button to add a timeline and click the dropdown on the selection tool.
- Click on Microsoft Facial Analysis, which will be the only option available.
- Using the blue timeline on the right, drag the slider to the desired start and stop time when the video is to be analyzed for faces to blur, or leave it at default to analyze the entire video.
- Click the save button to finalize.
Once the analysis is completed, the user will be notified via a system-generated email with a link to view and select all faces.
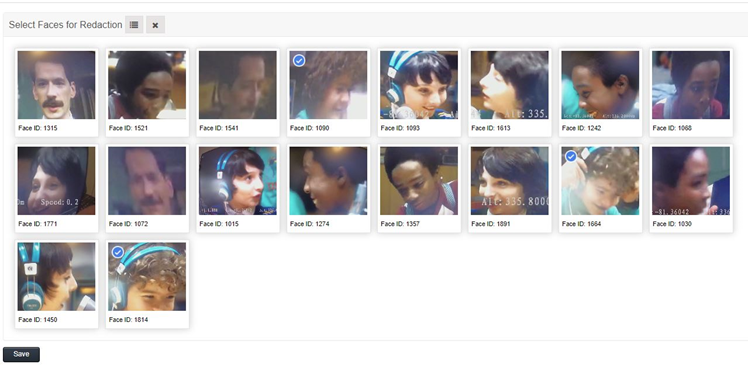
Once the face selection page loads, perform the following steps:
- Click the upper left corner of the thumbnail to select that face for Redaction, and a blue check mark will appear.
- Click on the hamburger icon to select all and the x icon to clear all selections if needed.
- Click on the save button at the bottom of the list once finished.

Locating redacted Assets
Once a redaction job is saved and the processing is complete, the user that requested the redaction job will receive an email confirming the redaction is complete and will contain a link to the redacted video.
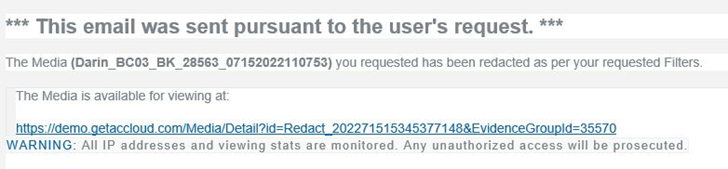
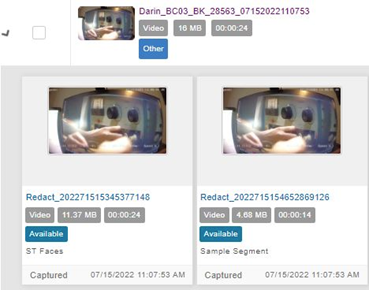
Redacted Assets appear grouped as child Assets with the original file. The file name for a redacted Asset always begins with the word Redact.
See the example below: