Feb 11, 2025
 827
827
Note:
This article showcases features that are typically only made available to Administrator roles.
However, since Getac Enterprise is highly configurable, the ability to complete tasks described in this article may be different for each User, depending on policy. Please contact an administrator with all access questions and concerns.
However, since Getac Enterprise is highly configurable, the ability to complete tasks described in this article may be different for each User, depending on policy. Please contact an administrator with all access questions and concerns.
Overview
This feature allows for adding additional Assets to an existing Asset or Asset Group via the Asset Upload feature. This is useful when adding media that was captured by non-Getac cameras to a group that was.
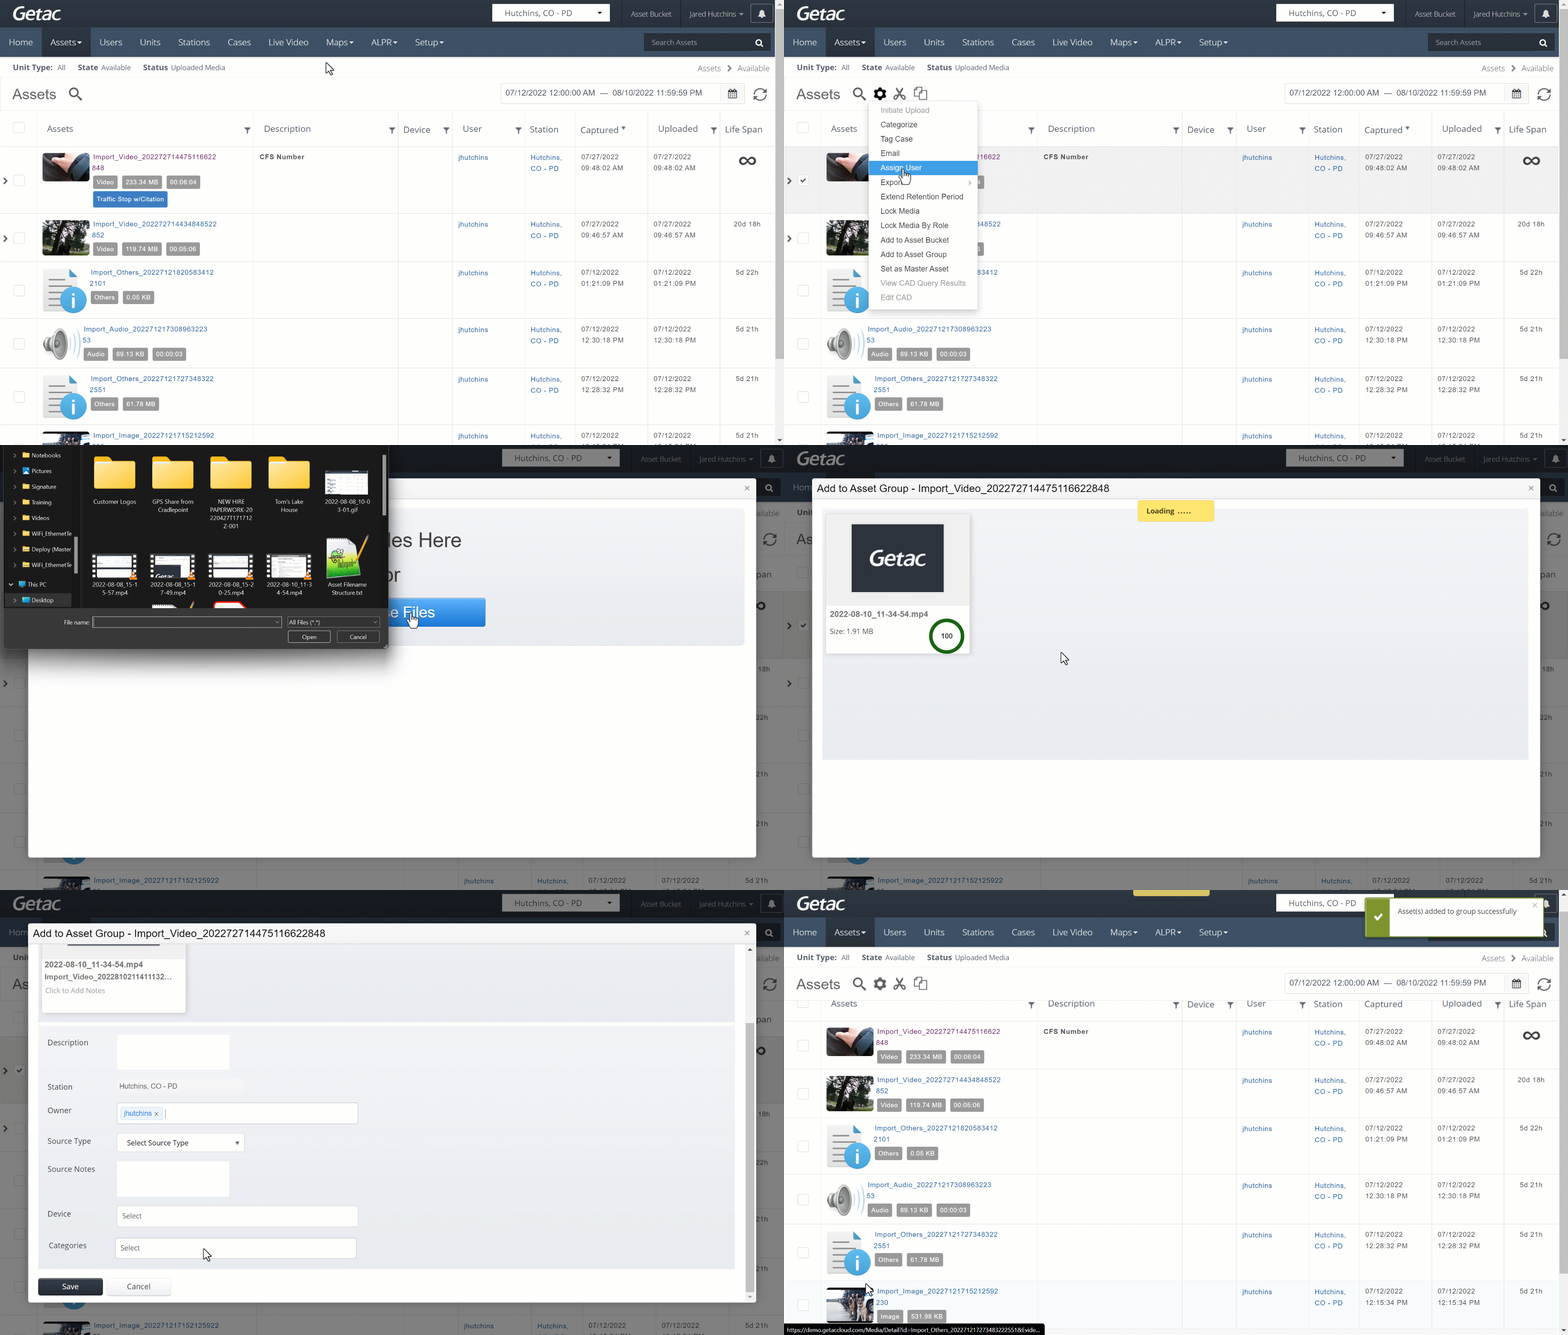
Perform the following steps to add to Asset Group:
- Search for the desired Asset or Asset Group.
- Check the box to the left of the Asset.
- Click on the Gear Icon, then Add to Asset Group.
- Drag and drop, or open File Explorer to select the new Asset.
- Minimum, add an owner and Category.
- Add other Metadata as desired.
- Click on the Save button.
See the image below for how to add to an Asset Group:

Note:
Video Assets that are uploaded in this manner will not play back together with other videos in the newly created group. If needed, use the Multi-View Player in the Asset Bucket for playback.


